


Kiwi (Actinidia deliciosa) is a delicious and nutritious fruit that has been eaten in New Zealand for centuries. And now, this superfruit is making its way into the mainstream market. This little green furry fruit is making some waves in the superfruit stakes! When researching for this article, it is abundantly clear why!
- Kiwi fruit is rich in vitamins C and E and potassium.
- Kiwis are also a great source of natural dietary fiber and a natural digestive aid, thanks to the abundance of the enzyme actinidain found within them.
- Kiwi can help balance your pH levels by keeping your stomach alkaline, balance blood sugar levels by slowing down the release of insulin production from the pancreas, and may provide relief from digestive tract ulcers.
- Kiwis are also an excellent source of vitamin K, which is an essential vitamin required for great bone health.
- Kiwis are also a great source of lutein and zeaxanthin, important for eye health.
- This high fiber and low-calorie combination prevalent in kiwi is ideal for weight management. A medium-sized kiwi contains around 50 calories and the fiber content creates a sense of fullness in the stomach.
- Kiwi is also a natural beauty food that can improve hair and skin conditions or even slow aging!
Here are some great culinary tips on how you can eat kiwi for optimal health benefits.
How Can I Incorporate Kiwi?
Kiwi is a low-calorie and high-nutrient fruit that is packed with antioxidants.
To get the most out of this superfruit, here are some tips on how to eat kiwi:
1) Enjoy kiwi as a snack /thelostherbs.com/wp-content/uploads/2022/02/The-Superfruit-You-Should-Eat-Every-Day-Kiwi-Snack-300x200.jpg" target="_blank">https://thelostherbs.com/wp-content/uploads/2022/0...ery-Day-Kiwi-Snack-300x200.jpg 300w" width="350" />
Kiwis are perfect for snacking any time of the day.
Slice up a fresh one with some almond butter, peanut butter, or hummus for an afternoon snack, or enjoy it as a refreshing treat after dinner.
2) Eat kiwi as part of breakfast /thelostherbs.com/wp-content/uploads/2022/02/The-Superfruit-You-Should-Eat-Every-Day-Kiwi-Breakfast-300x201.jpg" target="_blank">https://thelostherbs.com/wp-content/uploads/2022/0...Day-Kiwi-Breakfast-300x201.jpg 300w" width="350" />
Start your morning off healthily with a bowl of oatmeal mixed with sliced bananas and diced kiwis, or very simply on a morning breakfast platter.
3) Cut up kiwis to make a salad more appetizing
 /thelostherbs.com/wp-content/uploads/2022/02/The-Superfruit-You-Should-Eat-Every-Day-Kiwi-300x169.jpg" target="_blank">https://thelostherbs.com/wp-content/uploads/2022/0...Eat-Every-Day-Kiwi-300x169.jpg 300w" width="350" />Add some chopped fresh kiwis to salads or pasta dishes to give them a sweet yet tangy flavor.
Kiwi pairs well with tomato and olives for such a multidimensional taste.
Kiwis can also make a delicious and tangy dressing for salads when added with olive oil, salt and pepper, honey, and a touch of apple cider vinegar.
 /thelostherbs.com/wp-content/uploads/2022/02/The-Superfruit-You-Should-Eat-Every-Day-3-300x200.jpg" target="_blank">https://thelostherbs.com/wp-content/uploads/2022/0...ld-Eat-Every-Day-3-300x200.jpg 300w" width="350" />
4) Use peeled kiwis in your next baking recipe
The citrusy flavor from the peel makes any dish more refreshing!
When slightly dried, you can add kiwi rind as an addition or substitute for lemon or lime peel on top of oatmeal breakfast muffins, or make a quick hot syrup and pour over the muffins.
5) Turn freshly cut kiwis into a refreshing drink
 /thelostherbs.com/wp-content/uploads/2022/02/The-Superfruit-You-Should-Eat-Every-Day-Kiwi-Drink-300x300.jpg" target="_blank">https://thelostherbs.com/wp-content/uploads/2022/0...ery-Day-Kiwi-Drink-300x300.jpg 300w, https://thelostherbs.com/wp-content/uploads/2022/0...ery-Day-Kiwi-Drink-150x150.jpg 150w" width="350" />Slice up fresh kiwis into cubes, freeze them overnight, then blend them into a drink in the morning!
This delicious drink will have you feeling refreshed instantly, and it can be really accepting of other fruits, such as strawberries and raspberries.
6) Freeze when peeled and cut up
The best way to preserve kiwis is in the freezer, as they have high water content and freeze very well!
Frozen kiwis can be grated from frozen, making them really great for shaving over summer salads or quickly adding to smoothies.
How To Make The Most Of Your Kiwi
Kiwis are an excellent source of many nutrients, including vitamin C.
Vitamin C is critical to the immune system and can help stave off colds or other illnesses.
Kiwis are also a natural beauty food that can improve hair and skin conditions or even slow aging!
Below are some super tips on how to maximize your kiwi intake.
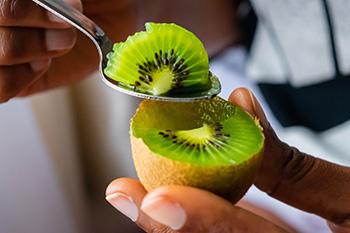
Eat Them Whole
 /thelostherbs.com/wp-content/uploads/2022/02/The-Superfruit-You-Should-Eat-Every-Day-Whole-Kiwi-300x201.jpg" target="_blank">https://thelostherbs.com/wp-content/uploads/2022/0...ery-Day-Whole-Kiwi-300x201.jpg 300w" width="350" />
Suppose you eat your kiwi peeled and whole.
In that case, you will gain the most benefit from them, but avoid peeling ahead of time as the enzymes in kiwi will react with the air when they’re exposed before digestion, and this will make the fruit more attractive to pests like insects.
Add Them To Smoothies.
 /thelostherbs.com/wp-content/uploads/2022/02/The-Superfruit-You-Should-Eat-Every-Day-Whole-Kiwis-300x207.jpg" target="_blank">https://thelostherbs.com/wp-content/uploads/2022/0...ry-Day-Whole-Kiwis-300x207.jpg 300w" width="350" />
You can blend your kiwi with other fruits like strawberries or bananas for a sweet treat that packs in nutrients.
You can also add green juices or make a fruit salad with other healthy foods like berries and apple slices.
Kiwis are easy ways to get more vitamins into your diet without having to change anything else about what you’re eating!
Kiwi And Banana Smoothie /thelostherbs.com/wp-content/uploads/2022/02/The-Superfruit-You-Should-Eat-Every-Day-Kiwi-Smoothie-300x261.jpg" target="_blank">https://thelostherbs.com/wp-content/uploads/2022/0...-Day-Kiwi-Smoothie-300x261.jpg 300w" width="350" />
- 1 cup sweetened Greek Yogurt
- 2 whole Kiwis – peeled and roughly chopped
- 1 whole Banana – peeled and sliced
- ½ cup of Almond Milk or Cashew Milk
- ½ a lime juiced
- 1 cup of ice shards
- chia seeds (optional)
Add Them To Homemade Dressings
Kiwis are soft when they are ripe, so they can easily be incorporated into dressings for salads and work well with other salad dressing ingredients such as: /thelostherbs.com/wp-content/uploads/2022/02/The-Superfruit-You-Should-Eat-Every-Day-Dressing-241x300.jpg" target="_blank">https://thelostherbs.com/wp-content/uploads/2022/0...Every-Day-Dressing-241x300.jpg 241w" width="350" />
- Mustard
- Olive Oil
- Balsamic Vinegar
- Apple Cider Vinegar
- Seasoning
- Lemon Juice
- Honey
Kiwi Burst Dressing
Ingredients: /thelostherbs.com/wp-content/uploads/2022/02/The-Superfruit-You-Should-Eat-Every-Day-Kiwi-Dressing-300x254.jpg" target="_blank">https://thelostherbs.com/wp-content/uploads/2022/0...-Day-Kiwi-Dressing-300x254.jpg 300w" width="350" />
- 4 Kiwis- Mashed
- 1/4 cup of fresh Orange juice
- Juice of one lemon
- 2 pinches of red chili flakes
- 1 clove of garlic, grated
- 1/2 tsp Cracked black pepper
- Pink salt to taste
Add Them Into Salads
Kiwi can be the best star ingredient in summer salads!
This is such a different take on the traditional salad but is refreshing, delicious, and nutritious!
Kiwi And Strawberry Spinach Bowl
Ingredients: /thelostherbs.com/wp-content/uploads/2022/02/The-Superfruit-You-Should-Eat-Every-Day-Kiwi-Salad-200x300.jpg" target="_blank">https://thelostherbs.com/wp-content/uploads/2022/0...ery-Day-Kiwi-Salad-200x300.jpg 200w" width="350" />
- 6 cups of baby spinach
- 2 whole kiwi, peeled and sliced
- 2 cups of sliced strawberries
- ½ cup f walnuts
- ¼ red onion, thinly sliced
Dressing:
- ⅓ cup of apple cider vinegar
- 2 tablespoons of honey
- 1 teaspoon of cracked black pepper
- ⅓ olive oil
Kiwi is such a delicious and nutritious fruit that can be eaten on its own or combined with other foods.
For example, you can enjoy a kiwi with your breakfast cereal, sprinkle it over your salad for some extra flavor and nutrients, or eat it as a snack along with some yogurt.
Takeaway
Kiwis are a great addition to your diet.
Using kiwi can be really fun and a simple way to add the superfruit into your day, and they taste great on top of a bowl of cereal or on the side of your yogurt!
If you are allergic to kiwi, and some people are, you can substitute the kiwi for guava, papaya, or dragonfruit!

 /thelostherbs.com/wp-content/uploads/2022/01/Rosemary-and-Sage-Sore-Throat-Spray-1-300x225.jpg" target="_blank">https://thelostherbs.com/wp-content/uploads/2022/0...ore-Throat-Spray-1-300x225.jpg 300w" width="500" />
 /thelostherbs.com/wp-content/uploads/2022/01/Rosemary-and-Sage-Sore-Throat-Spray-2.jpg" target="_blank">https://thelostherbs.com/wp-content/uploads/2022/0...d-Sage-Sore-Throat-Spray-2.jpg 500w" width="350" />
 /thelostherbs.com/wp-content/uploads/2022/01/Rosemary-and-Sage-Sore-Throat-Spray-3-300x225.jpg" target="_blank">https://thelostherbs.com/wp-content/uploads/2022/0...ore-Throat-Spray-3-300x225.jpg 300w" width="500" />
 /thelostherbs.com/wp-content/uploads/2022/01/Rosemary-and-Sage-Sore-Throat-Spray-4-300x225.jpg" target="_blank">https://thelostherbs.com/wp-content/uploads/2022/0...ore-Throat-Spray-4-300x225.jpg 300w" width="500" />
 /thelostherbs.com/wp-content/uploads/2022/01/Rosemary-and-Sage-Sore-Throat-Spray-5-300x225.jpg" target="_blank">https://thelostherbs.com/wp-content/uploads/2022/0...ore-Throat-Spray-5-300x225.jpg 300w" width="500" />
 /thelostherbs.com/wp-content/uploads/2022/01/Lemongrass-1-300x200.jpg" target="_blank">https://thelostherbs.com/wp-content/uploads/2022/01/Lemongrass-1-300x200.jpg 300w" width="350" />
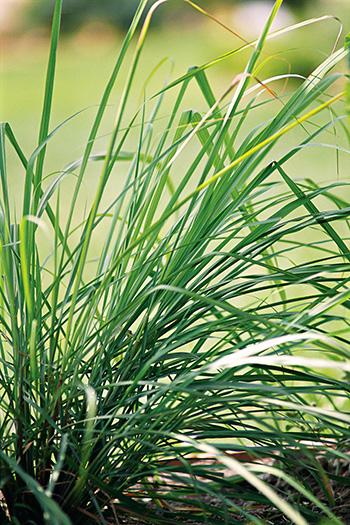 /thelostherbs.com/wp-content/uploads/2022/01/Lemongrass-Identification-200x300.jpg" target="_blank">https://thelostherbs.com/wp-content/uploads/2022/0...ass-Identification-200x300.jpg 200w" width="350" />
 /thelostherbs.com/wp-content/uploads/2022/01/Growing-Lemongrass-226x300.jpg" target="_blank">https://thelostherbs.com/wp-content/uploads/2022/01/Growing-Lemongrass-226x300.jpg 226w" width="350" />Lemongrass is generally propagated through stem cuttings or root division. Some seed supply stores may also sell seeds that are ideal for growing lemongrass in large plantations. But if you have an existing plant, the easiest way is to regrow it through its roots or bulbs.
 /thelostherbs.com/wp-content/uploads/2022/01/Growing-Lemongrass-2-243x300.jpg" target="_blank">https://thelostherbs.com/wp-content/uploads/2022/01/Growing-Lemongrass-2-243x300.jpg 243w" width="350" />Plant the division in a pot or at least 1 to 2 feet apart in the open field. If growing it in a pot, put it in a warm area where it can soak up some sun. Once established, the plants hardly require maintenance and will flourish on their own.
 /thelostherbs.com/wp-content/uploads/2022/01/Harvest-Lemongrass-300x225.jpg" target="_blank">https://thelostherbs.com/wp-content/uploads/2022/01/Harvest-Lemongrass-300x225.jpg 300w" width="350" />Lemongrass can be harvested anytime when you need it as soon as the clump already has many leaves. This will usually take about three months after planting. Cut the stalk at ground level using a sharp knife, scissors, or twisting it with your bare hand. Frequent trimming of the plant is necessary to encourage more growth.
 /thelostherbs.com/wp-content/uploads/2022/01/Lemongrass-Benefits-203x300.jpg" target="_blank">https://thelostherbs.com/wp-content/uploads/2022/01/Lemongrass-Benefits-203x300.jpg 203w" width="350" />
 /thelostherbs.com/wp-content/uploads/2022/01/Lemongrass-Ingredients-300x225.jpg" target="_blank">https://thelostherbs.com/wp-content/uploads/2022/0...ngrass-Ingredients-300x225.jpg 300w" width="350" />
 /thelostherbs.com/wp-content/uploads/2022/01/Lemongrass-Step-1-300x225.jpg" target="_blank">https://thelostherbs.com/wp-content/uploads/2022/01/Lemongrass-Step-1-300x225.jpg 300w" width="500" />
 /thelostherbs.com/wp-content/uploads/2022/01/Lemongrass-Step-2-300x225.jpg" target="_blank">https://thelostherbs.com/wp-content/uploads/2022/01/Lemongrass-Step-2-300x225.jpg 300w" width="500" />
 /thelostherbs.com/wp-content/uploads/2022/01/Lemongrass-Step-3-300x225.jpg" target="_blank">https://thelostherbs.com/wp-content/uploads/2022/01/Lemongrass-Step-3-300x225.jpg 300w" width="500" />
 /thelostherbs.com/wp-content/uploads/2022/01/Lemongrass-Step-4-300x225.jpg" target="_blank">https://thelostherbs.com/wp-content/uploads/2022/01/Lemongrass-Step-4-300x225.jpg 300w" width="500" />
 /thelostherbs.com/wp-content/uploads/2022/01/20-Uses-and-Benefits-of-Pine-Pollen-What-is-Pine-Pollen-1-e1641928042664-255x300.jpg" target="_blank">https://thelostherbs.com/wp-content/uploads/2022/0...n-1-e1641928042664-255x300.jpg 255w" width="350" />
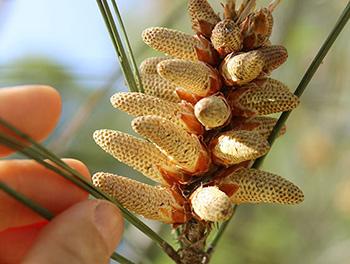 /thelostherbs.com/wp-content/uploads/2022/01/20-Uses-and-Benefits-of-Pine-Pollen-Benefits-300x226.jpg" target="_blank">https://thelostherbs.com/wp-content/uploads/2022/0...ne-Pollen-Benefits-300x226.jpg 300w" width="350" />1. Improving Levels Of Testosterone
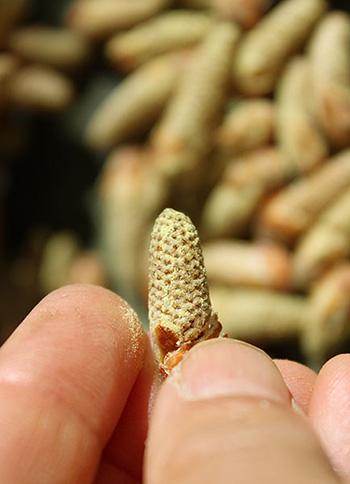 /thelostherbs.com/wp-content/uploads/2022/01/20-Uses-and-Benefits-of-Pine-Pollen-Benefits-2-217x300.jpg" target="_blank">https://thelostherbs.com/wp-content/uploads/2022/0...-Pollen-Benefits-2-217x300.jpg 217w" width="350" />
 /thelostherbs.com/wp-content/uploads/2022/01/20-Uses-and-Benefits-of-Pine-Pollen-Benefits-3-300x208.jpg" target="_blank">https://thelostherbs.com/wp-content/uploads/2022/0...-Pollen-Benefits-3-300x208.jpg 300w" width="350" />6. Healthy Libido Support
 /thelostherbs.com/wp-content/uploads/2022/01/20-Uses-and-Benefits-of-Pine-Pollen-Benefits-4-e1641928004717-300x186.jpg" target="_blank">https://thelostherbs.com/wp-content/uploads/2022/0...s-4-e1641928004717-300x186.jpg 300w" width="350" />7. Inflammatory Assistance
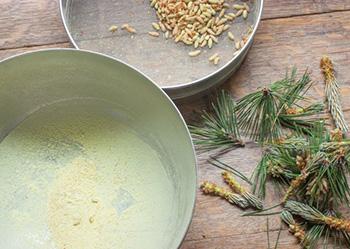 /thelostherbs.com/wp-content/uploads/2022/01/20-Uses-and-Benefits-of-Pine-Pollen-Benefits-5-300x213.jpg" target="_blank">https://thelostherbs.com/wp-content/uploads/2022/0...-Pollen-Benefits-5-300x213.jpg 300w" width="350" />
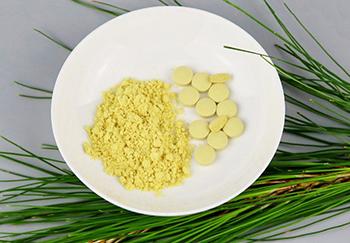 /thelostherbs.com/wp-content/uploads/2022/01/20-Uses-and-Benefits-of-Pine-Pollen-Supplements-300x208.jpg" target="_blank">https://thelostherbs.com/wp-content/uploads/2022/0...Pollen-Supplements-300x208.jpg 300w" width="350" />
 /thelostherbs.com/wp-content/uploads/2022/01/20-Uses-and-Benefits-of-Pine-Pollen-Baking-300x206.jpg" target="_blank">https://thelostherbs.com/wp-content/uploads/2022/0...Pine-Pollen-Baking-300x206.jpg 300w" width="350" />Pine pollen can be turned into a powdered format and added to flours and dry ingredients for baking.
 /thelostherbs.com/wp-content/uploads/2022/01/20-Uses-and-Benefits-of-Pine-Pollen-Tincture-259x300.jpg" target="_blank">https://thelostherbs.com/wp-content/uploads/2022/0...ne-Pollen-Tincture-259x300.jpg 259w" width="350" />Tinctures are a superb way to get the correct elements of pine pollen in the right places when needed.
 /thelostherbs.com/wp-content/uploads/2022/01/20-Uses-and-Benefits-of-Pine-Pollen-Tea-300x197.jpg" target="_blank">https://thelostherbs.com/wp-content/uploads/2022/0...of-Pine-Pollen-Tea-300x197.jpg 300w" width="350" />
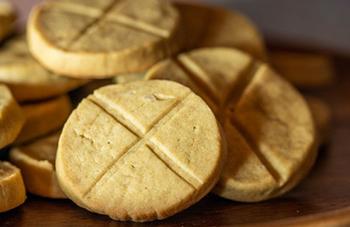 /thelostherbs.com/wp-content/uploads/2022/01/20-Uses-and-Benefits-of-Pine-Pollen-Snacks-300x195.jpg" target="_blank">https://thelostherbs.com/wp-content/uploads/2022/0...Pine-Pollen-Snacks-300x195.jpg 300w" width="350" />
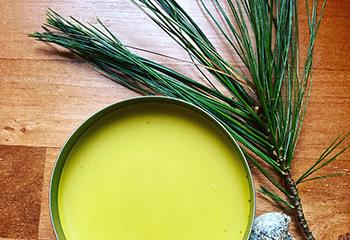 /thelostherbs.com/wp-content/uploads/2022/01/20-Uses-and-Benefits-of-Pine-Pollen-Salve-300x206.jpg" target="_blank">https://thelostherbs.com/wp-content/uploads/2022/0...-Pine-Pollen-Salve-300x206.jpg 300w" width="350" />
 /thelostherbs.com/wp-content/uploads/2022/01/20-Uses-and-Benefits-of-Pine-Pollen-Smoothies-300x233.jpg" target="_blank">https://thelostherbs.com/wp-content/uploads/2022/0...e-Pollen-Smoothies-300x233.jpg 300w" width="350" />Adding pine pollen to a superfood juice or smoothie can increase the uptake of the pine pollen goodness, along with many other natural health benefits the other ingredients can give you.
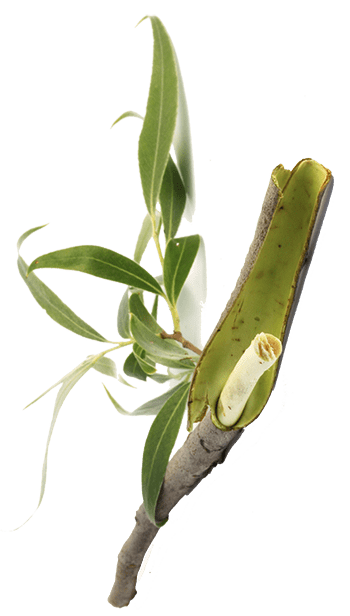 /thelostherbs.com/wp-content/uploads/2022/01/Willow-Identification-170x300.png" target="_blank">https://thelostherbs.com/wp-content/uploads/2022/01/Willow-Identification-170x300.png 170w" width="350" />
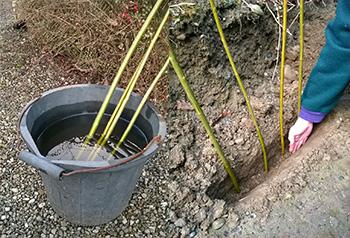 /thelostherbs.com/wp-content/uploads/2022/01/How-to-Grow-Willow-300x204.jpg" target="_blank">https://thelostherbs.com/wp-content/uploads/2022/01/How-to-Grow-Willow-300x204.jpg 300w" width="350" />Willows prefer deep, moist, rich soils that are well-draining. Most willows prefer full sun. They are very fast-growing plants with strong root systems which provide excellent erosion control. In the landscape, it is sensible to avoid growing willows near houses, foundations, septic fields, water, and sewer lines as the aggressive, water-seeking roots can cause unwanted damage.
 /thelostherbs.com/wp-content/uploads/2022/01/Harvest-Willow-300x237.jpg" target="_blank">https://thelostherbs.com/wp-content/uploads/2022/01/Harvest-Willow-300x237.jpg 300w" width="350" />The best time to harvest willow bark is in the spring or the fall. Find 1- to 2-year-old willow branches that are less than ½ an inch in diameter. Using shears, pruners, or scissors, trim several feet of branches to harvest the bark from. There is no need to harvest willow bark from mature tree trunks. Not only can this scar the tree, but this bark is also often very hard and thick with deep fissures. The bark from mature tree trunks is thought to be of little medicinal value anyway.
 /thelostherbs.com/wp-content/uploads/2022/01/Willow-Extract-200x300.jpg" target="_blank">https://thelostherbs.com/wp-content/uploads/2022/01/Willow-Extract-200x300.jpg 200w" width="350" />Willow bark’s main use is for pain relief. People make tea from the bark for its anti-inflammatory and painkilling action. Some people prefer to chew on unprocessed willow bark to naturally extract the salicin and other pain-relieving plant particles to help aid fever, headaches, and arthritis pain. Interestingly, many health food stores and drugstores carry willow bark in powdered or encapsulated form. Similarly, willow bark extracts, liquids, and tinctures are available as a substitute for aspirin.
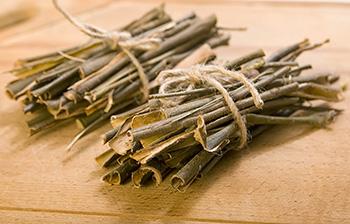 /thelostherbs.com/wp-content/uploads/2022/01/Willow-Bark-300x192.jpg" target="_blank">https://thelostherbs.com/wp-content/uploads/2022/01/Willow-Bark-300x192.jpg 300w" width="350" />From as far back as the earliest human civilizations 5500 years ago, the leaves and bark of willows have been used to treat aches and fever. Over the last couple of centuries, the salicin of willows has been isolated and studied. This has brought about the production of fever-reducing and pain-relieving medicines. Notably aspirin and other non-steroidal anti-inflammatory drugs (NSAIDS).
 /thelostherbs.com/wp-content/uploads/2022/01/Willow-Recipe-Step-2-300x209.jpg" target="_blank">https://thelostherbs.com/wp-content/uploads/2022/01/Willow-Recipe-Step-2-300x209.jpg 300w" width="500" />
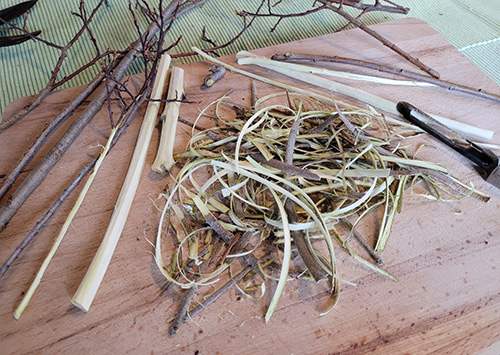 /thelostherbs.com/wp-content/uploads/2022/01/Willow-Recipe-Step-3-300x213.jpg" target="_blank">https://thelostherbs.com/wp-content/uploads/2022/01/Willow-Recipe-Step-3-300x213.jpg 300w" width="500" />
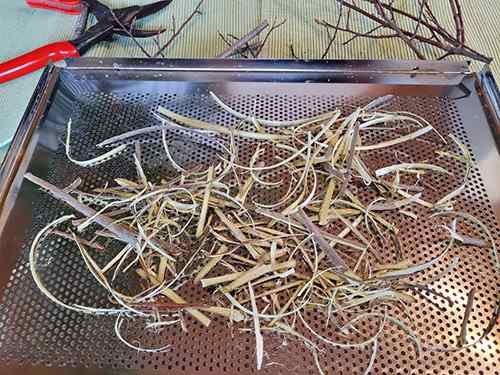 /thelostherbs.com/wp-content/uploads/2022/01/Willow-Recipe-Step-4-300x225.jpg" target="_blank">https://thelostherbs.com/wp-content/uploads/2022/01/Willow-Recipe-Step-4-300x225.jpg 300w" width="500" />
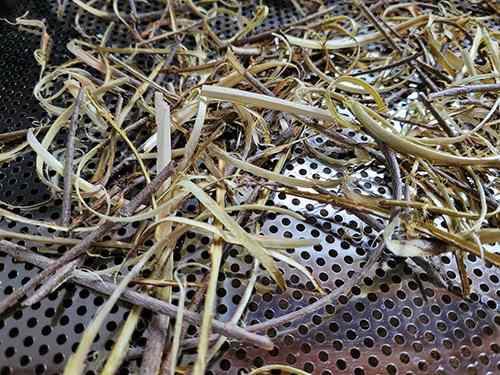 /thelostherbs.com/wp-content/uploads/2022/01/Willow-Recipe-Step-5-300x225.jpg" target="_blank">https://thelostherbs.com/wp-content/uploads/2022/01/Willow-Recipe-Step-5-300x225.jpg 300w" width="500" />
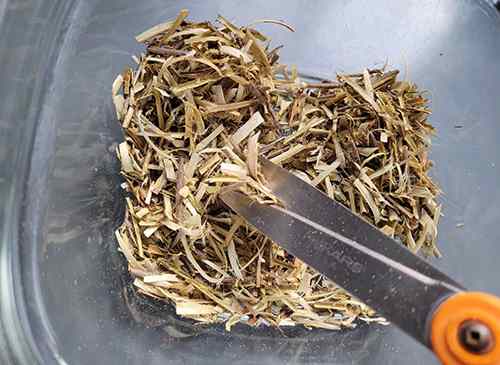 /thelostherbs.com/wp-content/uploads/2022/01/Willow-Recipe-Step-6-300x219.jpg" target="_blank">https://thelostherbs.com/wp-content/uploads/2022/01/Willow-Recipe-Step-6-300x219.jpg 300w" width="500" />
 /thelostherbs.com/wp-content/uploads/2022/01/Willow-Recipe-Step-7-300x225.jpg" target="_blank">https://thelostherbs.com/wp-content/uploads/2022/01/Willow-Recipe-Step-7-300x225.jpg 300w" width="500" />
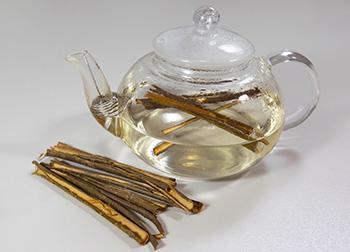 /thelostherbs.com/wp-content/uploads/2022/01/Willow-Tea-300x216.jpg" target="_blank">https://thelostherbs.com/wp-content/uploads/2022/01/Willow-Tea-300x216.jpg 300w" width="350" />Tea: This dried willow bark is ready to make a hot cup of pain-relieving tea. Use 1 teaspoon bark to 1 cup of boiled water. Steep for 10 minutes and strain. Take up to 3 times daily.
 /thelostherbs.com/wp-content/uploads/2022/01/Willow-Species-300x45.jpg" target="_blank">https://thelostherbs.com/wp-content/uploads/2022/01/Willow-Species-300x45.jpg 300w,
 /thelostherbs.com/wp-content/uploads/2022/01/Soothing-Elixir-for-Cold-and-Flu-Season-Ingredients-300x287.jpg" target="_blank">https://thelostherbs.com/wp-content/uploads/2022/0...Season-Ingredients-300x287.jpg 300w" width="350" />
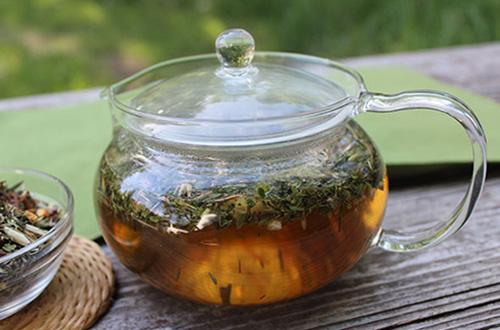 /thelostherbs.com/wp-content/uploads/2022/01/Soothing-Elixir-for-Cold-and-Flu-Season-Step-1-300x198.jpg" target="_blank">https://thelostherbs.com/wp-content/uploads/2022/0...-Flu-Season-Step-1-300x198.jpg 300w" width="500" />
 /thelostherbs.com/wp-content/uploads/2022/01/Soothing-Elixir-for-Cold-and-Flu-Season-Step-2-300x175.jpg" target="_blank">https://thelostherbs.com/wp-content/uploads/2022/0...-Flu-Season-Step-2-300x175.jpg 300w" width="500" />
 /thelostherbs.com/wp-content/uploads/2022/01/Soothing-Elixir-for-Cold-and-Flu-Season-Step-3-300x227.jpg" target="_blank">https://thelostherbs.com/wp-content/uploads/2022/0...-Flu-Season-Step-3-300x227.jpg 300w" width="500" />
 /thelostherbs.com/wp-content/uploads/2022/01/Soothing-Elixir-for-Cold-and-Flu-Season-Step-4-300x173.jpg" target="_blank">https://thelostherbs.com/wp-content/uploads/2022/0...-Flu-Season-Step-4-300x173.jpg 300w" width="500" />
 /thelostherbs.com/wp-content/uploads/2022/01/50-Uses-for-Ginger-Respiratory-Issues-300x231.jpg" target="_blank">https://thelostherbs.com/wp-content/uploads/2022/0...Respiratory-Issues-300x231.jpg 300w" width="350" />3. Helps With Respiratory Infections
 /thelostherbs.com/wp-content/uploads/2022/01/50-Uses-for-Ginger-Menstrual-Pain-300x207.jpg" target="_blank">https://thelostherbs.com/wp-content/uploads/2022/0...ger-Menstrual-Pain-300x207.jpg 300w" width="350" />7. Can Reduce Menstrual Pain
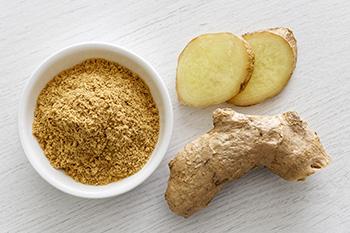 /thelostherbs.com/wp-content/uploads/2022/01/50-Uses-for-Ginger-Type-2-Diabetes-300x200.jpg" target="_blank">https://thelostherbs.com/wp-content/uploads/2022/0...er-Type-2-Diabetes-300x200.jpg 300w" width="350" />
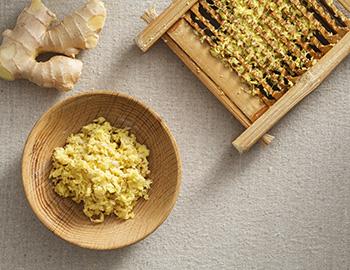
 /thelostherbs.com/wp-content/uploads/2022/01/50-Uses-for-Ginger-Acne-300x199.jpg" target="_blank">https://thelostherbs.com/wp-content/uploads/2022/0...es-for-Ginger-Acne-300x199.jpg 300w" width="350" />Did you know that consuming ginger can help with your acne? While it will not cure it, the anti-inflammatory characteristics of this spice can reduce the inflammation of the skin. If you are looking for instant help, you can make a mask of equal parts of grated ginger and apple cider vinegar. Apply to acne and leave on for a few minutes.
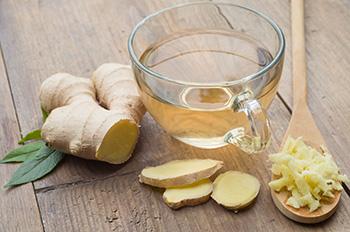 /thelostherbs.com/wp-content/uploads/2022/01/50-Uses-for-Ginger-Digestion-300x199.jpg" target="_blank">https://thelostherbs.com/wp-content/uploads/2022/0...r-Ginger-Digestion-300x199.jpg 300w" width="350" />
 /thelostherbs.com/wp-content/uploads/2022/01/50-Uses-for-Ginger-Hair-300x199.jpg" target="_blank">https://thelostherbs.com/wp-content/uploads/2022/0...es-for-Ginger-Hair-300x199.jpg 300w" width="350" />
 /thelostherbs.com/wp-content/uploads/2022/01/50-Uses-for-Ginger-Migraines-300x210.jpg" target="_blank">https://thelostherbs.com/wp-content/uploads/2022/0...r-Ginger-Migraines-300x210.jpg 300w" width="350" />Before talking about ginger as a migraine treatment, let’s understand how a migraine occurs. When a migraine begins prostaglandins are first produced, which causes muscle contractions and pain. Blood vessels become inflamed and certain hormones are triggered to cause nausea. Taking ginger when you first feel the twitch of a migraine coming on will prevent the cascade started by prostaglandins. It will also provide pain relief and help settle the stomach.
 /thelostherbs.com/wp-content/uploads/2022/01/50-Uses-for-Ginger-Libido-300x228.jpg" target="_blank">https://thelostherbs.com/wp-content/uploads/2022/0...-for-Ginger-Libido-300x228.jpg 300w" width="350" />32. Increases The Libido
 /thelostherbs.com/wp-content/uploads/2022/01/alfalfa-History-300x279.jpg" target="_blank">https://thelostherbs.com/wp-content/uploads/2022/01/alfalfa-History-300x279.jpg 300w" width="350" />Alfalfa is a plant native to South-central Asia, specifically in ancient Iran. It was widely used as fodder for the horses that were brought from Central Asia. This wild and indigenous plant spread to Arabia where its name “alfalfa” was coined, which translates to “the best forage.” I
 /thelostherbs.com/wp-content/uploads/2022/01/Alfalfa-identification-132x300.png" target="_blank">https://thelostherbs.com/wp-content/uploads/2022/0...lfa-identification-132x300.png 132w" width="350" />
 /thelostherbs.com/wp-content/uploads/2022/01/Growing-Alfalfa-from-seeds-300x197.jpg" target="_blank">https://thelostherbs.com/wp-content/uploads/2022/0...Alfalfa-from-seeds-300x197.jpg 300w" width="350" />You can easily purchase alfalfa seeds from the grocery or any feed supply shop. If you live in regions with a cooler climate, you can grow your alfalfa plant in spring. For milder regions, fall is the best time for sowing alfalfa seeds.
 /thelostherbs.com/wp-content/uploads/2022/01/Growing-Alfalfa-from-Cuttings-300x218.jpg" target="_blank">https://thelostherbs.com/wp-content/uploads/2022/0...alfa-from-Cuttings-300x218.jpg 300w" width="350" />Propagating alfalfa from cuttings is ideal if you want only a small patch of ground for it to cover. Cuttings are also more stable if you already have a healthy growth of established plants available. Planting the alfalfa cuttings is best done at least a week before the frost.
 /thelostherbs.com/wp-content/uploads/2022/01/Alfalfa-Plant-Care-300x219.jpg" target="_blank">https://thelostherbs.com/wp-content/uploads/2022/01/Alfalfa-Plant-Care-300x219.jpg 300w" width="350" />
 /thelostherbs.com/wp-content/uploads/2022/01/Harvest-Alfalfa-213x300.jpg" target="_blank">https://thelostherbs.com/wp-content/uploads/2022/01/Harvest-Alfalfa-213x300.jpg 213w" width="350" />
 /thelostherbs.com/wp-content/uploads/2022/01/Alfalfa-Sandwich-1-300x207.jpg" target="_blank">https://thelostherbs.com/wp-content/uploads/2022/01/Alfalfa-Sandwich-1-300x207.jpg 300w" width="350" />
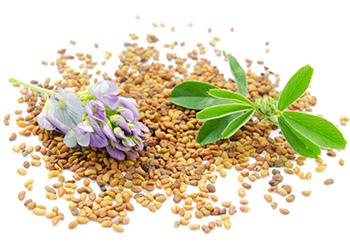 /thelostherbs.com/wp-content/uploads/2022/01/Alfalfa-Natural-Remedies-300x209.jpg" target="_blank">https://thelostherbs.com/wp-content/uploads/2022/0...a-Natural-Remedies-300x209.jpg 300w" width="350" />
 /thelostherbs.com/wp-content/uploads/2022/01/Alfalfa-Tincture-ingredients-300x199.jpg" target="_blank">https://thelostherbs.com/wp-content/uploads/2022/0...ncture-ingredients-300x199.jpg 300w" width="350" />
 /thelostherbs.com/wp-content/uploads/2022/01/Alfalfa-Tincture-Step-1-300x193.jpg" target="_blank">https://thelostherbs.com/wp-content/uploads/2022/0...fa-Tincture-Step-1-300x193.jpg 300w" width="500" />
 /thelostherbs.com/wp-content/uploads/2022/01/Alfalfa-Tincture-Step-2-300x225.jpg" target="_blank">https://thelostherbs.com/wp-content/uploads/2022/0...fa-Tincture-Step-2-300x225.jpg 300w" width="500" />
 /thelostherbs.com/wp-content/uploads/2022/01/Alfalfa-Tincture-Step-3-300x187.jpg" target="_blank">https://thelostherbs.com/wp-content/uploads/2022/0...fa-Tincture-Step-3-300x187.jpg 300w" width="500" />
 /thelostherbs.com/wp-content/uploads/2022/01/Alfalfa-Tincture-Step-4-300x187.jpg" target="_blank">https://thelostherbs.com/wp-content/uploads/2022/0...fa-Tincture-Step-4-300x187.jpg 300w" width="500" />
 /thelostherbs.com/wp-content/uploads/2022/01/Alfalfa-Tincture-Step-5-300x217.jpg" target="_blank">https://thelostherbs.com/wp-content/uploads/2022/0...fa-Tincture-Step-5-300x217.jpg 300w" width="500" />
 /thelostherbs.com/wp-content/uploads/2021/12/Fenugreek-History-300x279.jpg" target="_blank">https://thelostherbs.com/wp-content/uploads/2021/12/Fenugreek-History-300x279.jpg 300w" width="350" />Methi is a plant that grows abundantly in the wilds of India and southern Europe. It is believed to exist more than six thousand years ago.
 /thelostherbs.com/wp-content/uploads/2021/12/Fenugreek-Identification-200x300.jpg" target="_blank">https://thelostherbs.com/wp-content/uploads/2021/1...eek-Identification-200x300.jpg 200w" width="350" />
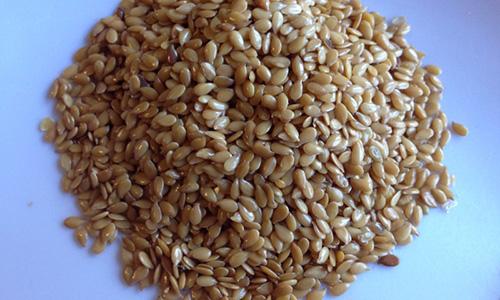
 /thelostherbs.com/wp-content/uploads/2021/12/Fenugreek-seeds-300x201.jpg" target="_blank">https://thelostherbs.com/wp-content/uploads/2021/12/Fenugreek-seeds-300x201.jpg 300w" width="350" />
 /thelostherbs.com/wp-content/uploads/2021/12/Fenugreek-1-300x200.jpg" target="_blank">https://thelostherbs.com/wp-content/uploads/2021/12/Fenugreek-1-300x200.jpg 300w" width="350" />
 /thelostherbs.com/wp-content/uploads/2021/12/Growing-Fenugreek-300x199.jpg" target="_blank">https://thelostherbs.com/wp-content/uploads/2021/12/Growing-Fenugreek-300x199.jpg 300w" width="350" />Fenugreek is abundant in warm regions since it does not like cooler and moist climates. They can thrive well in USDA Zones 8B to 11 and flourish during the spring and summer seasons. In tropical regions, methi is grown whole year-round.
 /thelostherbs.com/wp-content/uploads/2021/12/Growing-Fenugreek-in-a-pot-289x300.jpg" target="_blank">https://thelostherbs.com/wp-content/uploads/2021/1...Fenugreek-in-a-pot-289x300.jpg 289w" width="350" />
 /thelostherbs.com/wp-content/uploads/2021/12/Fenugreek-Plant-Care-300x200.jpg" target="_blank">https://thelostherbs.com/wp-content/uploads/2021/12/Fenugreek-Plant-Care-300x200.jpg 300w" width="350" />
 /thelostherbs.com/wp-content/uploads/2021/12/Harvest-Fenugreek-300x296.jpg" target="_blank">https://thelostherbs.com/wp-content/uploads/2021/12/Harvest-Fenugreek-300x296.jpg 300w" width="350" />
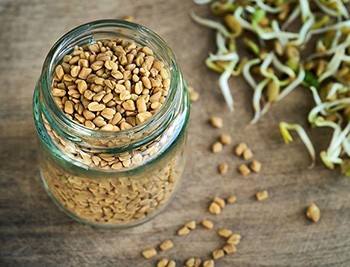 /thelostherbs.com/wp-content/uploads/2021/12/Fenugreek-in-a-jar-300x229.jpg" target="_blank">https://thelostherbs.com/wp-content/uploads/2021/12/Fenugreek-in-a-jar-300x229.jpg 300w" width="350" />To store fresh fenugreek leaves, roughly chop the unwashed leaves and lightly wrap them in aluminum foil. Place the foil in a Ziplock bag and put it in the freezer. They can stay there for many months without losing their flavor and color. The trick is not to wash the leaves after harvesting or chopping, as any moisture in the leaves will cause them to rot. Wash the leaves only when you take them out when they are ready for use.
 /thelostherbs.com/wp-content/uploads/2021/12/Fenugreek-Natural-benefits-200x300.jpg" target="_blank">https://thelostherbs.com/wp-content/uploads/2021/1...k-Natural-benefits-200x300.jpg 200w" width="350" />
 /thelostherbs.com/wp-content/uploads/2021/12/Fenugreek-Ingredients-300x219.jpg" target="_blank">https://thelostherbs.com/wp-content/uploads/2021/12/Fenugreek-Ingredients-300x219.jpg 300w" width="350" />
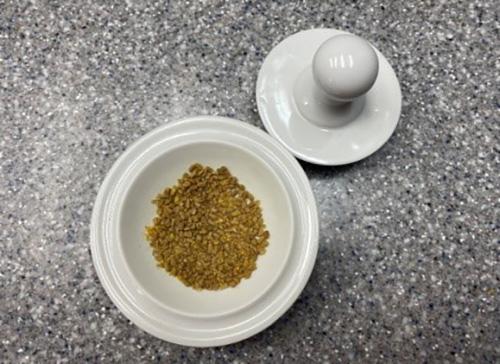 /thelostherbs.com/wp-content/uploads/2021/12/Fenugreek-Tea-Step-1-300x218.jpg" target="_blank">https://thelostherbs.com/wp-content/uploads/2021/12/Fenugreek-Tea-Step-1-300x218.jpg 300w" width="500" />
 /thelostherbs.com/wp-content/uploads/2021/12/Fenugreek-Tea-Step-2-300x217.jpg" target="_blank">https://thelostherbs.com/wp-content/uploads/2021/12/Fenugreek-Tea-Step-2-300x217.jpg 300w" width="500" />
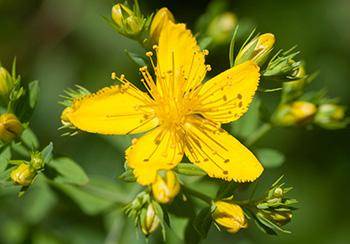 /thelostherbs.com/wp-content/uploads/2021/08/Natural-Remedies-for-Fibromyalgia-Pain-St-Johns-Wort-e1629739081500-300x209.jpg" target="_blank">https://thelostherbs.com/wp-content/uploads/2021/0...ort-e1629739081500-300x209.jpg 300w" width="350" />While no studies have been done on the effect of
  /thelostherbs.com/wp-content/uploads/2021/08/Natural-Remedies-for-Fibromyalgia-Pain-Echinacea-e1629739125329-300x203.jpg" target="_blank">https://thelostherbs.com/wp-content/uploads/2021/0...cea-e1629739125329-300x203.jpg
 Dried and ground turmeric roots have been used as a pain reliever and anti-inflammatory for centuries, particularly in India. More recently, turmeric’s active ingredient, curcumin, has been called the ‘herbal ibuprofen.’
 /thelostherbs.com/wp-content/uploads/2021/08/Natural-Remedies-for-Fibromyalgia-Pain-Arnica-e1629739199195-300x202.jpg" target="_blank">https://thelostherbs.com/wp-content/uploads/2021/0...ica-e1629739199195-300x202.jpg 300w" width="350" />Arnica has been used for treating bruises, inflammations, and muscle pain since medieval times.
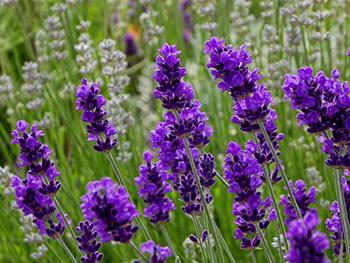 /thelostherbs.com/wp-content/uploads/2021/08/Natural-Remedies-for-Fibromyalgia-Pain-Lavender-300x225.jpg" target="_blank">https://thelostherbs.com/wp-content/uploads/2021/0...lgia-Pain-Lavender-300x225.jpg
 /thelostherbs.com/wp-content/uploads/2022/01/Astragalus-History-300x221.jpg" target="_blank">https://thelostherbs.com/wp-content/uploads/2022/01/Astragalus-History-300x221.jpg 300w" width="350" />Astragalus is believed to have the capacity to prolong human life. Aside from oral intake, some hospitals also give astragalus via injection or through intravenous fluids. But before taking astragalus in any form, make sure to talk with your attending physician first since it can interact with other drugs you might be taking.
 /thelostherbs.com/wp-content/uploads/2022/01/Astragalus-Identification-175x300.png" target="_blank">https://thelostherbs.com/wp-content/uploads/2022/0...lus-Identification-175x300.png 175w" width="350" />
 /thelostherbs.com/wp-content/uploads/2022/01/Astragalus-Seeds-300x300.jpg" target="_blank">https://thelostherbs.com/wp-content/uploads/2022/01/Astragalus-Seeds-300x300.jpg 300w,
 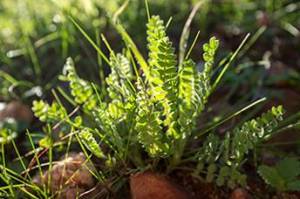 /thelostherbs.com/wp-content/uploads/2022/01/Growing-Astragalus-1.jpg" target="_blank">https://thelostherbs.com/wp-content/uploads/2022/01/Growing-Astragalus-1.jpg 344w" width="350" />Plant
 /thelostherbs.com/wp-content/uploads/2022/01/Growing-Astragalus-2-300x203.jpg" target="_blank">https://thelostherbs.com/wp-content/uploads/2022/01/Growing-Astragalus-2-300x203.jpg 300w" width="350" />Germination usually takes 3 to days after sowing. When watering, water slowly and deeply. Astragalus thrives better in moist soil, but not too damp. You can transfer the plants to bigger pots once they are a few inches tall.
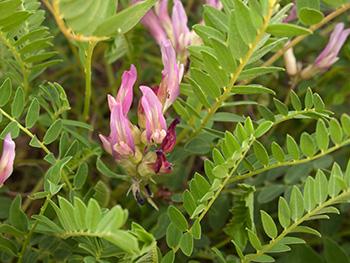 /thelostherbs.com/wp-content/uploads/2022/01/Growing-Astragalus-3-300x225.jpg" target="_blank">https://thelostherbs.com/wp-content/uploads/2022/01/Growing-Astragalus-3-300x225.jpg 300w" width="350" />After the last frost, it is now safe to plant the potted astragalus outside. If you have several astragalus plants you want to transfer to outside grounds, make sure to evenly space them 8 to 16 inches apart.
 /thelostherbs.com/wp-content/uploads/2022/01/Astragalus-Harvest.jpg" target="_blank">https://thelostherbs.com/wp-content/uploads/2022/01/Astragalus-Harvest.jpg 350w" width="350" />Roots of any age from astragalus can be harvested at any time. However, it is best to wait for a few years if you want a potent medicine. Astragalus needs to grow for 2 to 4 years before you can make use of its root for medicinal purposes. The older the roots are, the more effective they are.
 /thelostherbs.com/wp-content/uploads/2022/01/Astragalus-Natural-remedies-219x300.jpg" target="_blank">https://thelostherbs.com/wp-content/uploads/2022/0...s-Natural-remedies-219x300.jpg 219w" width="350" />
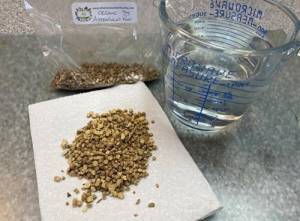 /thelostherbs.com/wp-content/uploads/2022/01/Astragalus-Decoction-Ingredients.jpg" target="_blank">https://thelostherbs.com/wp-content/uploads/2022/0...alus-Decoction-Ingredients.jpg 500w" width="350" />
 /thelostherbs.com/wp-content/uploads/2022/01/Astragalus-Decoction-Step-1-300x225.jpg" target="_blank">https://thelostherbs.com/wp-content/uploads/2022/0...s-Decoction-Step-1-300x225.jpg 300w" width="500" />
 /thelostherbs.com/wp-content/uploads/2022/01/Astragalus-Decoction-Step-2-300x194.jpg" target="_blank">https://thelostherbs.com/wp-content/uploads/2022/0...s-Decoction-Step-2-300x194.jpg 300w" width="500" />
 /thelostherbs.com/wp-content/uploads/2022/01/Astragalus-Decoction-Step-3-300x210.jpg" target="_blank">https://thelostherbs.com/wp-content/uploads/2022/0...s-Decoction-Step-3-300x210.jpg 300w" width="500" />
 /thelostherbs.com/wp-content/uploads/2022/01/Astragalus-Decoction-Step-4-300x225.jpg" target="_blank">https://thelostherbs.com/wp-content/uploads/2022/0...s-Decoction-Step-4-300x225.jpg 300w" width="500" />
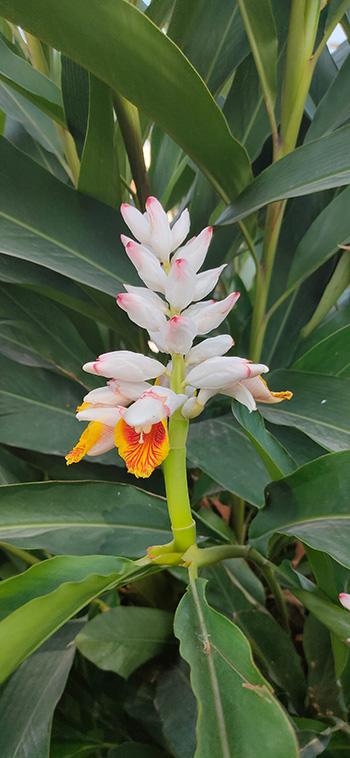 /thelostherbs.com/wp-content/uploads/2021/12/Cardamom-Identification-139x300.jpg" target="_blank">https://thelostherbs.com/wp-content/uploads/2021/1...mom-Identification-139x300.jpg 139w" width="350" />
 /thelostherbs.com/wp-content/uploads/2021/12/Cardamom-Pods-300x221.jpg" target="_blank">https://thelostherbs.com/wp-content/uploads/2021/12/Cardamom-Pods-300x221.jpg 300w" width="350" />Cardamom has two main varieties that are identifiable through their fruits. The black varieties have bigger fruits than the green ones. However, green cardamom has a more potent flavor and is considered the true cardamom. The Indian cardamom has two main varieties that are cultivated as a spice:
 /thelostherbs.com/wp-content/uploads/2021/12/Growing-Cardamom-by-Seeds-300x196.jpg" target="_blank">https://thelostherbs.com/wp-content/uploads/2021/1...-Cardamom-by-Seeds-300x196.jpg 300w" width="350" />
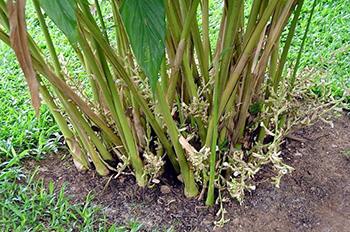 /thelostherbs.com/wp-content/uploads/2021/12/Growing-Cardamom-Through-Division-300x199.jpg" target="_blank">https://thelostherbs.com/wp-content/uploads/2021/1...m-Through-Division-300x199.jpg 300w" width="350" />Cardamom plants that are at least one year old can be divided to grow new plants. The best time for digging rhizomes is during spring or autumn when the soil is cool and moist. Cut the underground stem of the established plant with at least three crowns and transplant it into a new hole. The hole should be twice as wide as the root clump you will be planting.
 /thelostherbs.com/wp-content/uploads/2021/12/Plant-Care-Requirements-1-300x200.jpg" target="_blank">https://thelostherbs.com/wp-content/uploads/2021/1...are-Requirements-1-300x200.jpg 300w" width="350" />
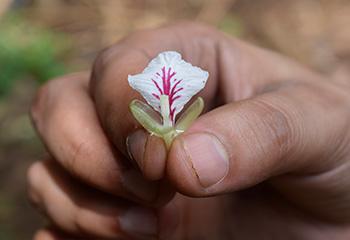 /thelostherbs.com/wp-content/uploads/2021/12/Harvesting-Cardamom-1-300x206.jpg" target="_blank">https://thelostherbs.com/wp-content/uploads/2021/12/Harvesting-Cardamom-1-300x206.jpg 300w" width="350" />Cardamom fruits will emerge usually in the third year of their plant life. Harvesting cardamom, even the commercial spices, are done by hands which also contributes to its expensiveness. Fruit production happens in August or September and the berries will likely remain on the plant until late February.
 /thelostherbs.com/wp-content/uploads/2021/12/Harvesting-Cardamom-300x188.jpg" target="_blank">https://thelostherbs.com/wp-content/uploads/2021/12/Harvesting-Cardamom-300x188.jpg 300w" width="350" />
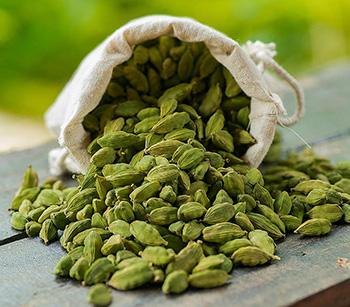 /thelostherbs.com/wp-content/uploads/2021/12/Cardamom-Benefits-300x263.jpg" target="_blank">https://thelostherbs.com/wp-content/uploads/2021/12/Cardamom-Benefits-300x263.jpg 300w" width="350" />
 /thelostherbs.com/wp-content/uploads/2021/12/Cardamom-Tea-Ingredients-300x200.jpg" target="_blank">https://thelostherbs.com/wp-content/uploads/2021/1...om-Tea-Ingredients-300x200.jpg 300w" width="350" />
 /thelostherbs.com/wp-content/uploads/2021/12/Cardamom-Tea-Step-1-300x207.jpg" target="_blank">https://thelostherbs.com/wp-content/uploads/2021/12/Cardamom-Tea-Step-1-300x207.jpg 300w" width="500" />
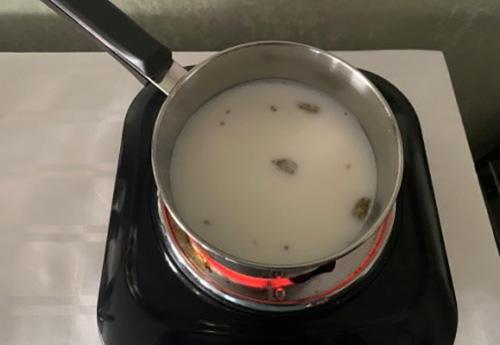 /thelostherbs.com/wp-content/uploads/2021/12/Cardamom-Tea-Step-1-1-300x207.jpg" target="_blank">https://thelostherbs.com/wp-content/uploads/2021/12/Cardamom-Tea-Step-1-1-300x207.jpg 300w" width="500" />
 /thelostherbs.com/wp-content/uploads/2021/12/Cardamom-Tea-Step-3-300x199.jpg" target="_blank">https://thelostherbs.com/wp-content/uploads/2021/12/Cardamom-Tea-Step-3-300x199.jpg 300w" width="500" />
 /thelostherbs.com/wp-content/uploads/2021/12/Cardamom-Tea-Step-4-300x200.jpg" target="_blank">https://thelostherbs.com/wp-content/uploads/2021/12/Cardamom-Tea-Step-4-300x200.jpg 300w" width="500" />
 /thelostherbs.com/wp-content/uploads/2021/12/DIY-Herbal-Throat-Syrup-Flaxseed-300x180.jpg" target="_blank">https://thelostherbs.com/wp-content/uploads/2021/1...oat-Syrup-Flaxseed-300x180.jpg 300w" width="500" />
 /thelostherbs.com/wp-content/uploads/2021/12/DIY-Herbal-Throat-Syrup-Thyme-T-300x177.jpg" target="_blank">https://thelostherbs.com/wp-content/uploads/2021/1...roat-Syrup-Thyme-T-300x177.jpg 300w" width="500" />
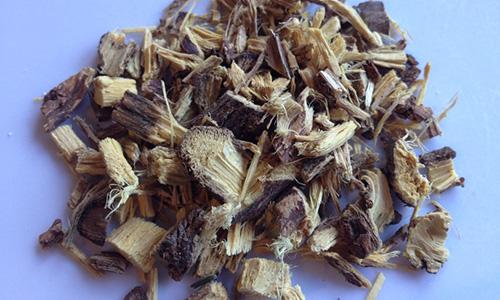 /thelostherbs.com/wp-content/uploads/2021/12/DIY-Herbal-Throat-Syrup-Licorice-Root-300x180.jpg" target="_blank">https://thelostherbs.com/wp-content/uploads/2021/1...yrup-Licorice-Root-300x180.jpg 300w" width="500" />
 /thelostherbs.com/wp-content/uploads/2021/12/DIY-Herbal-Throat-Syrup-White-Horehound-300x180.jpg" target="_blank">https://thelostherbs.com/wp-content/uploads/2021/1...up-White-Horehound-300x180.jpg 300w" width="500" />
 /thelostherbs.com/wp-content/uploads/2021/12/DIY-Herbal-Throat-Syrup-Marshmallow-300x180.jpg" target="_blank">https://thelostherbs.com/wp-content/uploads/2021/1...-Syrup-Marshmallow-300x180.jpg 300w" width="500" />
 /thelostherbs.com/wp-content/uploads/2021/12/DIY-Herbal-Throat-Syrup-Coltsfoot-300x180.jpg" target="_blank">https://thelostherbs.com/wp-content/uploads/2021/1...at-Syrup-Coltsfoot-300x180.jpg 300w" width="500" />
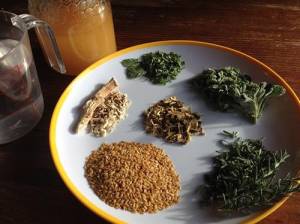 /thelostherbs.com/wp-content/uploads/2021/12/DIY-Herbal-Throat-Syrup-TIngredients.jpg" target="_blank">https://thelostherbs.com/wp-content/uploads/2021/1...-Throat-Syrup-TIngredients.jpg 500w" width="350" />
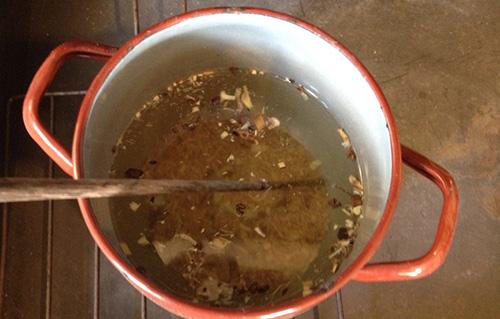 /thelostherbs.com/wp-content/uploads/2021/12/DIY-Herbal-Throat-Syrup-Step-1-300x191.jpg" target="_blank">https://thelostherbs.com/wp-content/uploads/2021/1...hroat-Syrup-Step-1-300x191.jpg 300w" width="500" />
 /thelostherbs.com/wp-content/uploads/2021/12/DIY-Herbal-Throat-Syrup-Step-2-300x213.jpg" target="_blank">https://thelostherbs.com/wp-content/uploads/2021/1...hroat-Syrup-Step-2-300x213.jpg 300w" width="500" />
 /thelostherbs.com/wp-content/uploads/2021/12/DIY-Herbal-Throat-Syrup-Step-3-300x223.jpg" target="_blank">https://thelostherbs.com/wp-content/uploads/2021/1...hroat-Syrup-Step-3-300x223.jpg 300w" width="500" />
 /thelostherbs.com/wp-content/uploads/2021/12/How-to-Make-Your-Own-Liquid-Xanax-Chamomile.jpg" target="_blank">https://thelostherbs.com/wp-content/uploads/2021/1...Own-Liquid-Xanax-Chamomile.jpg 500w" width="350" />German chamomile (Matricaria recutita) is a well-known relaxant that works on both the muscles and the nervous system. Small-scale human trials showed
 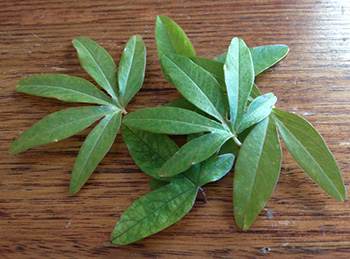 /thelostherbs.com/wp-content/uploads/2021/12/How-to-Make-Your-Own-Liquid-Xanax-Passionflower-300x222.jpg" target="_blank">https://thelostherbs.com/wp-content/uploads/2021/1...anax-Passionflower-300x222.jpg 300w" width="350" />Passion flower (Passiflora incarnata) leaves and flowers
  /thelostherbs.com/wp-content/uploads/2021/12/How-to-Make-Your-Own-Liquid-Xanax-Basil.jpg" target="_blank">https://thelostherbs.com/wp-content/uploads/2021/1...our-Own-Liquid-Xanax-Basil.jpg 500w" width="350" />Holy basil (Ocimum tenuiflorum or O. sanctum) is used for a wide range of
  /thelostherbs.com/wp-content/uploads/2021/12/How-to-Make-Your-Own-Liquid-XanaxTips.jpg" target="_blank">https://thelostherbs.com/wp-content/uploads/2021/1...-Your-Own-Liquid-XanaxTips.jpg 500w" width="350" />
 /thelostherbs.com/wp-content/uploads/2021/12/How-to-Make-Your-Own-Liquid-Xanax-St-Johns-Wort.jpg" target="_blank">https://thelostherbs.com/wp-content/uploads/2021/1...Liquid-Xanax-St-Johns-Wort.jpg 500w" width="350" />St John’s Wort (Hypericum perforatum) is good for over-stimulation, anxiety and especially
 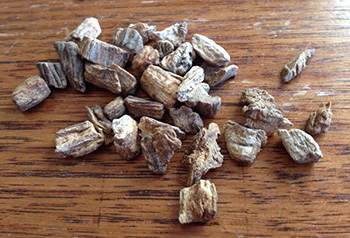 /thelostherbs.com/wp-content/uploads/2021/12/How-to-Make-Your-Own-Liquid-Xanax-Golden-root-300x204.jpg" target="_blank">https://thelostherbs.com/wp-content/uploads/2021/1...-Xanax-Golden-root-300x204.jpg 300w" width="350" />Golden root (Rhodiola rosea) can
  /thelostherbs.com/wp-content/uploads/2021/12/How-to-Make-Your-Own-Liquid-Xanax-lemon-balm.jpg" target="_blank">https://thelostherbs.com/wp-content/uploads/2021/1...wn-Liquid-Xanax-lemon-balm.jpg
 /thelostherbs.com/wp-content/uploads/2021/12/How-to-Make-Your-Own-Liquid-Xanax-Anxiety-300x230.jpg" target="_blank">https://thelostherbs.com/wp-content/uploads/2021/1...quid-Xanax-Anxiety-300x230.jpg 300w" width="500" />
 /thelostherbs.com/wp-content/uploads/2021/12/How-to-Make-Your-Own-Liquid-Xanax-depression-300x223.jpg" target="_blank">https://thelostherbs.com/wp-content/uploads/2021/1...d-Xanax-depression-300x223.jpg 300w" width="500" />
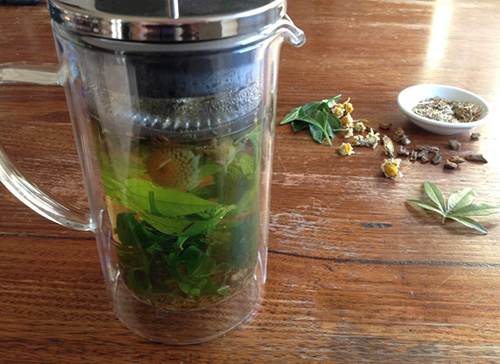 /thelostherbs.com/wp-content/uploads/2021/12/How-to-Make-Your-Own-Liquid-Xanax-side-effects-300x218.jpg" target="_blank">https://thelostherbs.com/wp-content/uploads/2021/1...Xanax-side-effects-300x218.jpg 300w" width="500" />
 /thelostherbs.com/wp-content/uploads/2021/12/How-to-Make-Your-Own-Liquid-Xanax-Method-300x232.jpg" target="_blank">https://thelostherbs.com/wp-content/uploads/2021/1...iquid-Xanax-Method-300x232.jpg 300w" width="500" />
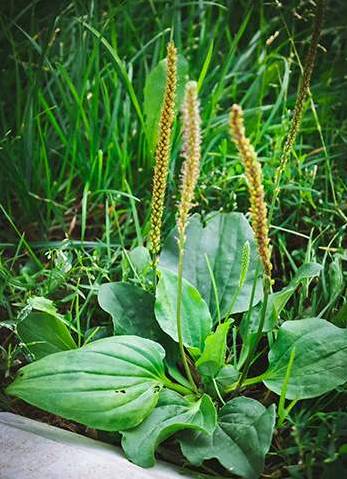 /thelostherbs.com/wp-content/uploads/2021/12/Healthy-Pringles-The-Nutritious-Leaves-That-Make-Crispy-Chips-Benefits-e1638551933510-217x300.jpg" target="_blank">https://thelostherbs.com/wp-content/uploads/2021/1...its-e1638551933510-217x300.jpg 217w" width="347" />
 /thelostherbs.com/wp-content/uploads/2021/12/Healthy-Pringles-The-Nutritious-Leaves-That-Make-Crispy-Chips-Foraging-Guide-300x218.jpg" target="_blank">https://thelostherbs.com/wp-content/uploads/2021/1...ips-Foraging-Guide-300x218.jpg
 /thelostherbs.com/wp-content/uploads/2021/12/Healthy-Pringles-The-Nutritious-Leaves-That-Make-Crispy-Chips-Plantain-Identification-300x254.jpg" target="_blank">https://thelostherbs.com/wp-content/uploads/2021/1...ain-Identification-300x254.jpg
 /thelostherbs.com/wp-content/uploads/2021/12/Healthy-Pringles-The-Nutritious-Leaves-That-Make-Crispy-Chips-Forage-plantain-300x204.jpg" target="_blank">https://thelostherbs.com/wp-content/uploads/2021/1...ps-Forage-plantain-300x204.jpg 300w" width="350" />If you don’t have any Plantago major plants near you, they are very easy plants to grow from seeds in your own back garden. Just be careful to keep them segregated from other parts of your garden because this herb can spread easily and will self-sow so you could end up with a lot more than you bargained for. They will grow in a USDA zone of between 3 and 9 and they enjoy anything from partial shade to full sun.
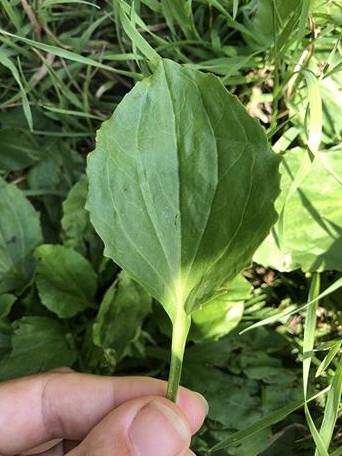 /thelostherbs.com/wp-content/uploads/2021/12/Healthy-Pringles-The-Nutritious-Leaves-That-Make-Crispy-Chips-Ingredients-e1638551970549-225x300.jpg" target="_blank">https://thelostherbs.com/wp-content/uploads/2021/1...nts-e1638551970549-225x300.jpg 225w" width="350" />
 /thelostherbs.com/wp-content/uploads/2021/12/Healthy-Pringles-The-Nutritious-Leaves-That-Make-Crispy-Chips-Step-1-300x238.jpg" target="_blank">https://thelostherbs.com/wp-content/uploads/2021/1...rispy-Chips-Step-1-300x238.jpg 300w" width="500" />
 /thelostherbs.com/wp-content/uploads/2021/12/Healthy-Pringles-The-Nutritious-Leaves-That-Make-Crispy-Chips-Step-3-300x173.jpg" target="_blank">https://thelostherbs.com/wp-content/uploads/2021/1...rispy-Chips-Step-3-300x173.jpg 300w" width="500" />
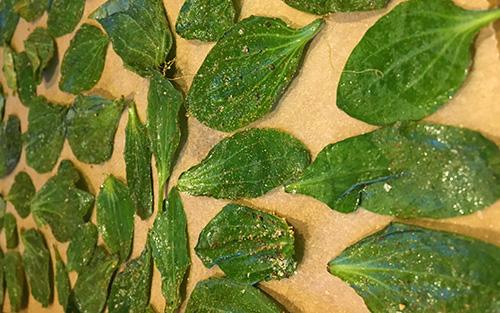 /thelostherbs.com/wp-content/uploads/2021/12/Healthy-Pringles-The-Nutritious-Leaves-That-Make-Crispy-Chips-Step-5-300x188.jpg" target="_blank">https://thelostherbs.com/wp-content/uploads/2021/1...rispy-Chips-Step-5-300x188.jpg 300w" width="500" />
 /thelostherbs.com/wp-content/uploads/2021/12/Healthy-Pringles-The-Nutritious-Leaves-That-Make-Crispy-Chips-Step-6-300x199.jpg" target="_blank">https://thelostherbs.com/wp-content/uploads/2021/1...rispy-Chips-Step-6-300x199.jpg 300w" width="500" />
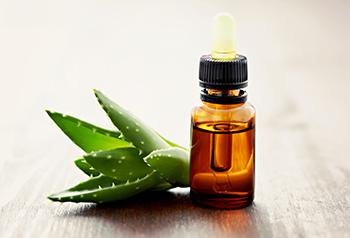 /thelostherbs.com/wp-content/uploads/2021/12/16-Home-Remedies-for-Herpes-Aloe-Vera-300x204.jpg" target="_blank">https://thelostherbs.com/wp-content/uploads/2021/1...r-Herpes-Aloe-Vera-300x204.jpg 300w" width="350" />
 /thelostherbs.com/wp-content/uploads/2021/12/16-Home-Remedies-for-Herpes-Witch-Hazel-300x190.jpg" target="_blank">https://thelostherbs.com/wp-content/uploads/2021/1...Herpes-Witch-Hazel-300x190.jpg 300w" width="350" />Witch Hazel
 /thelostherbs.com/wp-content/uploads/2021/12/16-Home-Remedies-for-Herpes-Rhubarb-and-Sage-300x172.jpg" target="_blank">https://thelostherbs.com/wp-content/uploads/2021/1...s-Rhubarb-and-Sage-300x172.jpg 300w" width="350" />Combined Sage And Rhubarb Extract
 /thelostherbs.com/wp-content/uploads/2021/12/Banner-Lemon-Balm-Tincture-295x300.jpg" target="_blank">https://thelostherbs.com/wp-content/uploads/2021/1...emon-Balm-Tincture-295x300.jpg
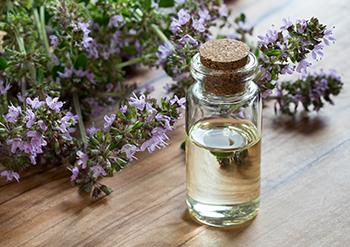 /thelostherbs.com/wp-content/uploads/2021/12/16-Home-Remedies-for-Herpes-Thyme-300x212.jpg" target="_blank">https://thelostherbs.com/wp-content/uploads/2021/1...s-for-Herpes-Thyme-300x212.jpg 300w" width="350" />Studies on this essential oil have shown that it has the potential to fight the herpes virus. As with the other essential oils, you will need to dilute them into a carrier oil before using them.
 /thelostherbs.com/wp-content/uploads/2021/12/Nicole_s-Apothecary-Allergy-_-Asthma-Support-Bundle-03_720x-150x150.jpg" target="_blank">https://thelostherbs.com/wp-content/uploads/2021/1...ort-Bundle-03_720x-150x150.jpg
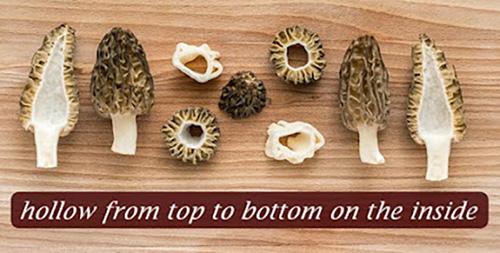 /thelostherbs.com/wp-content/uploads/2021/12/The-200-A-Pound-Mushroom-You-Should-Forage-for-Profit-Identification-300x152.jpg" target="_blank">https://thelostherbs.com/wp-content/uploads/2021/1...fit-Identification-300x152.jpg 300w" width="500" />
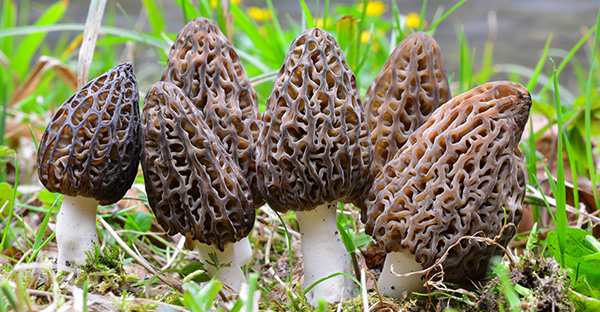 /thelostherbs.com/wp-content/uploads/2021/12/The-200-A-Pound-Mushroom-You-Should-Forage-for-Profit-What-are-Morels-300x156.jpg" target="_blank">https://thelostherbs.com/wp-content/uploads/2021/1...it-What-are-Morels-300x156.jpg 300w" width="500" />
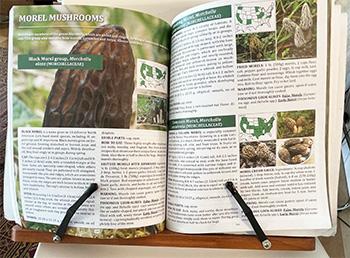 /thelostherbs.com/wp-content/uploads/2021/12/The-200-A-Pound-Mushroom-You-Should-Forage-for-Profit-Forage-book-300x221.jpg" target="_blank">https://thelostherbs.com/wp-content/uploads/2021/1...Profit-Forage-book-300x221.jpg
 /thelostherbs.com/wp-content/uploads/2021/12/The-200-A-Pound-Mushroom-You-Should-Forage-for-Profit-Forage-Morel-300x228.jpg" target="_blank">https://thelostherbs.com/wp-content/uploads/2021/1...rofit-Forage-Morel-300x228.jpg 300w" width="350" />If you primarily forage on public lands, which you share with the general public, you need to be careful about over-harvesting. When you grab every morel mushroom from a given spot, it deprives others of the opportunity, and you could even damage that location from producing again.
 /thelostherbs.com/wp-content/uploads/2021/12/The-200-A-Pound-Mushroom-You-Should-Forage-for-Profit-False-Morel-300x255.jpg" target="_blank">https://thelostherbs.com/wp-content/uploads/2021/1...Profit-False-Morel-300x255.jpg 300w" width="350" />
 /thelostherbs.com/wp-content/uploads/2021/12/The-200-A-Pound-Mushroom-You-Should-Forage-for-Profit-Watch-out-for-False-Morel-300x170.jpg" target="_blank">https://thelostherbs.com/wp-content/uploads/2021/1...ut-for-False-Morel-300x170.jpg 300w" width="500" />
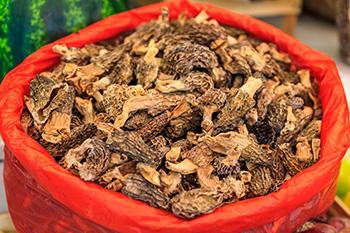 /thelostherbs.com/wp-content/uploads/2021/12/The-200-A-Pound-Mushroom-You-Should-Forage-for-Profit-expensive-300x200.jpg" target="_blank">https://thelostherbs.com/wp-content/uploads/2021/1...r-Profit-expensive-300x200.jpg 300w" width="350" />Their Growing Season is Short: Unlike a lot of other mushroom species, morels have a short growing season. Depending on climate, elevation, and weather, you can only collect them between March and June. This rarity is another reason why they are so popular. Dried and frozen morels are available year-round, but many claims that the taste is not comparable to a fresh mushroom.
 /thelostherbs.com/wp-content/uploads/2021/12/The-200-A-Pound-Mushroom-You-Should-Forage-for-Profit-Medicinal-Benefits-278x300.jpg" target="_blank">https://thelostherbs.com/wp-content/uploads/2021/1...Medicinal-Benefits-278x300.jpg 278w" width="350" />
 /thelostherbs.com/wp-content/uploads/2021/12/The-200-A-Pound-Mushroom-You-Should-Forage-for-Profit-Benefits-300x298.jpg" target="_blank">https://thelostherbs.com/wp-content/uploads/2021/1...or-Profit-Benefits-300x298.jpg 300w,
  /thelostherbs.com/wp-content/uploads/2021/12/The-200-A-Pound-Mushroom-You-Should-Forage-for-Profit-Air-Drying-300x183.jpg" target="_blank">https://thelostherbs.com/wp-content/uploads/2021/1...-Profit-Air-Drying-300x183.jpg 300w" width="350" />Thread the needle, then string the cleaned morel mushrooms lengthwise. Knot the thread at each morel mushroom end to keep them in place, leaving at least ½” between each morel so the air can circulate every mushroom. Hang the stringed mushrooms in a dry, cool place until the morels are brittle and completely dry. This should take anywhere from 2 days to 1 week.
 /thelostherbs.com/wp-content/uploads/2021/12/The-200-A-Pound-Mushroom-You-Should-Forage-for-Profit-dehydrator-300x200.jpg" target="_blank">https://thelostherbs.com/wp-content/uploads/2021/1...-Profit-dehydrator-300x200.jpg 300w" width="350" />
 /thelostherbs.com/wp-content/uploads/2021/11/What-Happens-If-You-Drink-Cranberry-Juice-Every-Day-Thanksgiving-300x201.jpg" target="_blank">https://thelostherbs.com/wp-content/uploads/2021/1...y-Day-Thanksgiving-300x201.jpg 300w" width="350" />Although some people only consider cranberries as a seasonal addition to a Thanksgiving dinner, there are some incredible benefits to be had when you consume them at all other points in the year.
 /thelostherbs.com/wp-content/uploads/2021/11/What-Happens-If-You-Drink-Cranberry-Juice-Every-Day-Benefits-200x300.jpg" target="_blank">https://thelostherbs.com/wp-content/uploads/2021/1...Every-Day-Benefits-200x300.jpg 200w" width="350" />
 /thelostherbs.com/wp-content/uploads/2021/11/What-Happens-If-You-Drink-Cranberry-Juice-Every-Day-Vitamins-218x300.jpg" target="_blank">https://thelostherbs.com/wp-content/uploads/2021/1...Every-Day-Vitamins-218x300.jpg 218w" width="350" />
 /thelostherbs.com/wp-content/uploads/2021/11/What-Happens-If-You-Drink-Cranberry-Juice-Every-Day-UTI-300x226.jpg" target="_blank">https://thelostherbs.com/wp-content/uploads/2021/1...uice-Every-Day-UTI-300x226.jpg 300w" width="350" />Infections of the urinary tract are incredibly common, especially in the female population. They can cause pain, discomfort, and irregular and painful urination.
 /thelostherbs.com/wp-content/uploads/2021/11/What-Happens-If-You-Drink-Cranberry-Juice-Every-Day-Hearth-Health-300x249.jpg" target="_blank">https://thelostherbs.com/wp-content/uploads/2021/1...-Day-Hearth-Health-300x249.jpg 300w" width="350" />Protective factors over the bad cholesterol, inhibiting it from oxidizing.
 /thelostherbs.com/wp-content/uploads/2021/11/What-Happens-If-You-Drink-Cranberry-Juice-Every-Day-Stomach-Ulcer-300x241.jpg" target="_blank">https://thelostherbs.com/wp-content/uploads/2021/1...-Day-Stomach-Ulcer-300x241.jpg 300w" width="350" />This is a super essential but super clever point to understand about cranberry juice!
 /thelostherbs.com/wp-content/uploads/2021/11/What-Happens-If-You-Drink-Cranberry-Juice-Every-Day-Preparation-300x200.jpg" target="_blank">https://thelostherbs.com/wp-content/uploads/2021/1...ry-Day-Preparation-300x200.jpg 300w" width="350" />
 /thelostherbs.com/wp-content/uploads/2021/11/What-Happens-If-You-Drink-Cranberry-Juice-Every-Day-Cranberry-Juice-300x200.jpg" target="_blank">https://thelostherbs.com/wp-content/uploads/2021/1...ay-Cranberry-Juice-300x200.jpg 300w" width="350" />Stir the cranberries occasionally, and you will see the mixture become foamy.
 /thelostherbs.com/wp-content/uploads/2021/11/What-Happens-If-You-Drink-Cranberry-Juice-Every-Day-Sauce-300x200.jpg" target="_blank">https://thelostherbs.com/wp-content/uploads/2021/1...ce-Every-Day-Sauce-300x200.jpg 300w" width="350" />
 /thelostherbs.com/wp-content/uploads/2021/12/Milk-Thistle-Silybum.jpg" target="_blank">https://thelostherbs.com/wp-content/uploads/2021/12/Milk-Thistle-Silybum.jpg 350w" width="300" />
 /thelostherbs.com/wp-content/uploads/2021/12/Where-to-Find-Milk-Thistle-300x223.jpg" target="_blank">https://thelostherbs.com/wp-content/uploads/2021/1...-Find-Milk-Thistle-300x223.jpg 300w" width="350" />Milk thistles are tough plants that can survive even in anthropogenic or polluted environments. They are forgiving of climate and growing conditions and are hard to eradicate. However, milk thistle often thrives abundantly in places with temperate climates.
 /thelostherbs.com/wp-content/uploads/2021/12/Milk-Thistle-Identification-131x300.png" target="_blank">https://thelostherbs.com/wp-content/uploads/2021/1...tle-Identification-131x300.png 131w" width="350" />
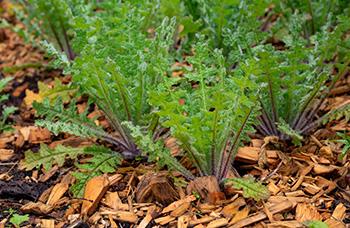 /thelostherbs.com/wp-content/uploads/2021/12/Growing-Milk-thistle-300x195.jpg" target="_blank">https://thelostherbs.com/wp-content/uploads/2021/12/Growing-Milk-thistle-300x195.jpg 300w" width="350" />Since milk thistles reproduce aggressively, most gardeners who cultivate them prefer
  /thelostherbs.com/wp-content/uploads/2021/12/Growing-Milk-Thistle-1-227x300.jpg" target="_blank">https://thelostherbs.com/wp-content/uploads/2021/1...ing-Milk-Thistle-1-227x300.jpg 227w" width="350" />
 /thelostherbs.com/wp-content/uploads/2021/12/Harvest-Milk-Thistle-300x218.jpg" target="_blank">https://thelostherbs.com/wp-content/uploads/2021/12/Harvest-Milk-Thistle-300x218.jpg 300w" width="350" />The seeds are the most valuable part of the plant that are harvested for medicinal use. You can harvest the flower heads when white pappus tufts or circles of hair crowns begin to replace the flowers. When left alone, these tufts get carried by the wind and new plants will sprout in unwanted places. You will know that the seeds are mature when it is already brown instead of green.
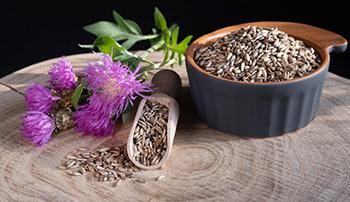 /thelostherbs.com/wp-content/uploads/2021/12/Milk-Thistle-Harvesting-300x173.jpg" target="_blank">https://thelostherbs.com/wp-content/uploads/2021/1...Thistle-Harvesting-300x173.jpg 300w" width="350" />
 /thelostherbs.com/wp-content/uploads/2021/12/Milk-Thistle-Natural-Remedies-300x200.jpg" target="_blank">https://thelostherbs.com/wp-content/uploads/2021/1...e-Natural-Remedies-300x200.jpg 300w" width="350" />For a long time, milk thistle has had a valuable contribution to the treatment of alcohol-related liver diseases. It is mainly because of the plant’s silymarin content. It helps in detoxifying and cleansing the blood. Cumulatively, a healthy liver may clear skin problems like acne and dermatitis. Milk thistle is also equally useful in the treatment of alcoholism.
 /thelostherbs.com/wp-content/uploads/2021/12/Milk-Thistle-Remedies-300x187.jpg" target="_blank">https://thelostherbs.com/wp-content/uploads/2021/12/Milk-Thistle-Remedies-300x187.jpg 300w" width="350" />The milk thistle extract, in combination with turmeric extract, has the capacity of reducing blood glucose. Thus, they are considered beneficial in the treatment of diabetes. The recommended dose is 210-600 mg of milk thistle extract a day in reducing blood sugar levels.
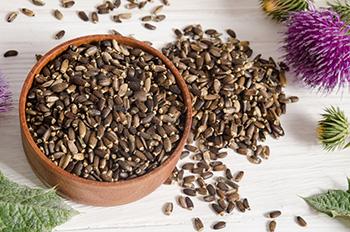 /thelostherbs.com/wp-content/uploads/2021/12/Harvesting-Milk-thistle-Seeds-300x199.jpg" target="_blank">https://thelostherbs.com/wp-content/uploads/2021/1...Milk-thistle-Seeds-300x199.jpg 300w" width="350" />
 /thelostherbs.com/wp-content/uploads/2021/12/Milk-Thistle-Step-1-300x203.jpg" target="_blank">https://thelostherbs.com/wp-content/uploads/2021/12/Milk-Thistle-Step-1-300x203.jpg 300w" width="500" />
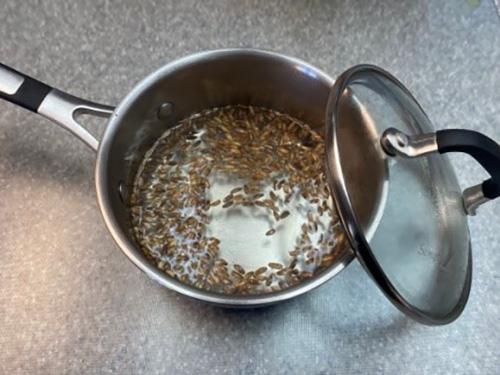 /thelostherbs.com/wp-content/uploads/2021/12/Milk-Thistle-Step-2-300x225.jpg" target="_blank">https://thelostherbs.com/wp-content/uploads/2021/12/Milk-Thistle-Step-2-300x225.jpg 300w" width="500" />
 /thelostherbs.com/wp-content/uploads/2021/12/Milk-Thistle-Step-3-300x199.jpg" target="_blank">https://thelostherbs.com/wp-content/uploads/2021/12/Milk-Thistle-Step-3-300x199.jpg 300w" width="500" />
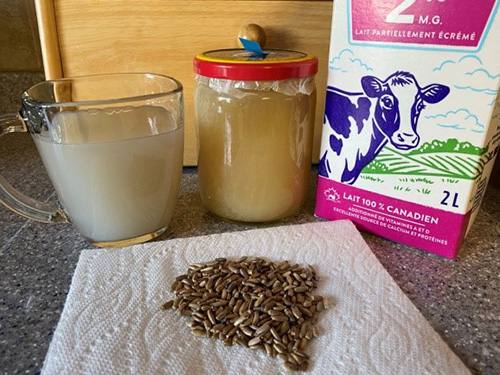 /thelostherbs.com/wp-content/uploads/2021/12/Milk-Thistle-Tea-300x225.jpg" target="_blank">https://thelostherbs.com/wp-content/uploads/2021/12/Milk-Thistle-Tea-300x225.jpg 300w" width="500" />
 /thelostherbs.com/wp-content/uploads/2021/11/How-to-Make-a-Cinnamon-Ginger-Salve-Cinnamon-for-the-Skin.jpg" target="_blank">https://thelostherbs.com/wp-content/uploads/2021/1...alve-Cinnamon-for-the-Skin.jpg 500w" width="350" />The main compound that gives cinnamon its distinctive taste and smell is cinnamaldehyde. The bark contains between 65 – 80% cinnamaldehyde, whereas the leaves only contain 1 – 5%. Cinnamaldehyde has been shown to dilate blood vessels and increase blood flow, which has numerous health benefits including reducing inflammation and accelerating healing. It is also a mild anti-bacterial.
 /thelostherbs.com/wp-content/uploads/2021/11/How-to-Make-a-Cinnamon-Ginger-Salve-Ginger-for-the-Skin.jpg" target="_blank">https://thelostherbs.com/wp-content/uploads/2021/1...-Salve-Ginger-for-the-Skin.jpg 500w" width="350" />Ginger essential oil has been shown to be a strong anti-microbial, even against gram-positive and gram-negative strains that are resistant against prescription medication. Studies have shown that many of the compounds responsible for its anti-microbial properties can be easily extracted via a basic oil infusion, as per the instructions below.
 /thelostherbs.com/wp-content/uploads/2021/11/How-to-Make-a-Cinnamon-Ginger-Salve-Ingredients.jpg" target="_blank">https://thelostherbs.com/wp-content/uploads/2021/1...n-Ginger-Salve-Ingredients.jpg 500w" width="350" />
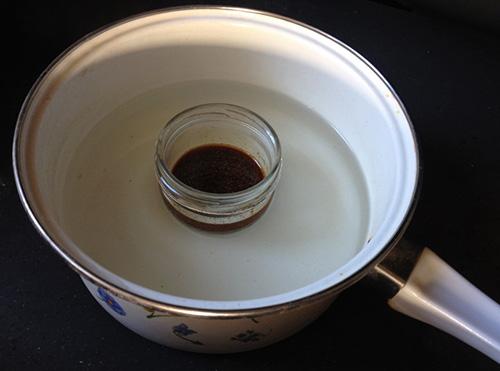 /thelostherbs.com/wp-content/uploads/2021/11/How-to-Make-a-Cinnamon-Ginger-Salve-Step-1-300x223.jpg" target="_blank">https://thelostherbs.com/wp-content/uploads/2021/1...inger-Salve-Step-1-300x223.jpg 300w" width="500" />
 /thelostherbs.com/wp-content/uploads/2021/11/How-to-Make-a-Cinnamon-Ginger-Salve-Step-2-300x221.jpg" target="_blank">https://thelostherbs.com/wp-content/uploads/2021/1...inger-Salve-Step-2-300x221.jpg 300w" width="500" />
 /thelostherbs.com/wp-content/uploads/2021/11/How-to-Make-a-Cinnamon-Ginger-Salve-Step-4-300x225.jpg" target="_blank">https://thelostherbs.com/wp-content/uploads/2021/1...inger-Salve-Step-4-300x225.jpg 300w" width="500" />
 /thelostherbs.com/wp-content/uploads/2021/11/The-Super-Herb-That-Destroys-Candida-What-is-Candida-300x200.jpg" target="_blank">https://thelostherbs.com/wp-content/uploads/2021/1...da-What-is-Candida-300x200.jpg 300w" width="350" />
 /thelostherbs.com/wp-content/uploads/2021/11/The-Super-Herb-That-Destroys-Candida-Candida-300x182.jpg" target="_blank">https://thelostherbs.com/wp-content/uploads/2021/1...ys-Candida-Candida-300x182.jpg 300w" width="350" />
 /thelostherbs.com/wp-content/uploads/2021/11/The-Super-Herb-That-Destroys-Candida-Diet-300x197.jpg" target="_blank">https://thelostherbs.com/wp-content/uploads/2021/1...troys-Candida-Diet-300x197.jpg 300w" width="350" />
 /thelostherbs.com/wp-content/uploads/2021/11/The-Super-Herb-That-Destroys-Candida-What-not-to-Eat-300x169.jpg" target="_blank">https://thelostherbs.com/wp-content/uploads/2021/1...da-What-not-to-Eat-300x169.jpg 300w" width="350" />Reduce The Amount Of Gluten In Your Diet: Gluten is widely known to be an inflammatory food group, which can cause problems with the overgrowth of candida. Gluten, again, is often broken down with great difficulty in the body into sugar compounds, which will feed and accelerate the candida.
 /thelostherbs.com/wp-content/uploads/2021/11/The-Super-Herb-That-Destroys-Candida-Oregano-300x267.jpg" target="_blank">https://thelostherbs.com/wp-content/uploads/2021/1...ys-Candida-Oregano-300x267.jpg 300w" width="350" />
 /thelostherbs.com/wp-content/uploads/2021/11/The-Super-Herb-That-Destroys-Candida-Oregnao-Oil-Step-1-300x167.jpg" target="_blank">https://thelostherbs.com/wp-content/uploads/2021/1...Oregnao-Oil-Step-1-300x167.jpg 300w" width="500" />
 /thelostherbs.com/wp-content/uploads/2021/11/The-Super-Herb-That-Destroys-Candida-Oregnao-Oil-Step-2-300x200.jpg" target="_blank">https://thelostherbs.com/wp-content/uploads/2021/1...Oregnao-Oil-Step-2-300x200.jpg 300w" width="500" />
 /thelostherbs.com/wp-content/uploads/2021/11/The-Super-Herb-That-Destroys-Candida-Oregnao-Oil-Step-3-300x200.jpg" target="_blank">https://thelostherbs.com/wp-content/uploads/2021/1...Oregnao-Oil-Step-3-300x200.jpg 300w" width="500" />
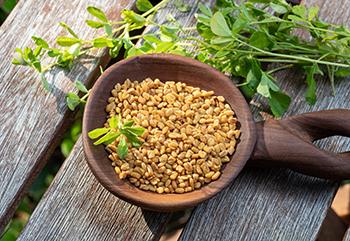 /thelostherbs.com/wp-content/uploads/2021/11/My-Herbal-Mixture-for-Chronic-Cough-Fenugreek-300x207.jpg" target="_blank">https://thelostherbs.com/wp-content/uploads/2021/1...ic-Cough-Fenugreek-300x207.jpg 300w" width="350" />
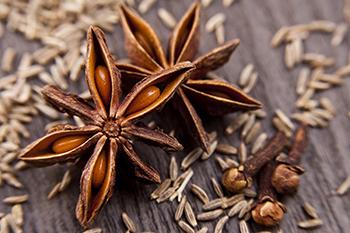 /thelostherbs.com/wp-content/uploads/2021/11/My-Herbal-Mixture-for-Chronic-Cough-Anise-300x200.jpg" target="_blank">https://thelostherbs.com/wp-content/uploads/2021/1...hronic-Cough-Anise-300x200.jpg 300w" width="350" />
 /thelostherbs.com/wp-content/uploads/2021/11/My-Herbal-Mixture-for-Chronic-Cough-Licorice-300x200.jpg" target="_blank">https://thelostherbs.com/wp-content/uploads/2021/1...nic-Cough-Licorice-300x200.jpg 300w" width="350" />Constituents: volatile oil, coumarins, chalcones, triterpenes, flavonoids.
 /thelostherbs.com/wp-content/uploads/2021/11/My-Herbal-Mixture-for-Chronic-Cough-Honey-300x234.jpg" target="_blank">https://thelostherbs.com/wp-content/uploads/2021/1...hronic-Cough-Honey-300x234.jpg 300w" width="350" />
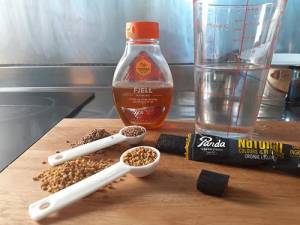 /thelostherbs.com/wp-content/uploads/2021/11/My-Herbal-Mixture-for-Chronic-Cough-Ingredients.jpg" target="_blank">https://thelostherbs.com/wp-content/uploads/2021/1...-Chronic-Cough-Ingredients.jpg 500w" width="350" />1 tsp of anise seeds
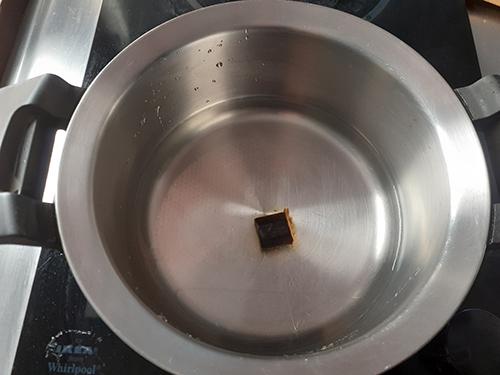 /thelostherbs.com/wp-content/uploads/2021/11/My-Herbal-Mixture-for-Chronic-Cough-Step-1-300x225.jpg" target="_blank">https://thelostherbs.com/wp-content/uploads/2021/1...ronic-Cough-Step-1-300x225.jpg 300w" width="500" />
 /thelostherbs.com/wp-content/uploads/2021/11/My-Herbal-Mixture-for-Chronic-Cough-Step-2-300x225.jpg" target="_blank">https://thelostherbs.com/wp-content/uploads/2021/1...ronic-Cough-Step-2-300x225.jpg 300w" width="500" />
 /thelostherbs.com/wp-content/uploads/2021/11/My-Herbal-Mixture-for-Chronic-Cough-Step-3.1-300x216.jpg" target="_blank">https://thelostherbs.com/wp-content/uploads/2021/1...nic-Cough-Step-3.1-300x216.jpg 300w" width="500" />
 /thelostherbs.com/wp-content/uploads/2021/11/My-Herbal-Mixture-for-Chronic-Cough-Step-3.2-300x225.jpg" target="_blank">https://thelostherbs.com/wp-content/uploads/2021/1...nic-Cough-Step-3.2-300x225.jpg 300w" width="500" />
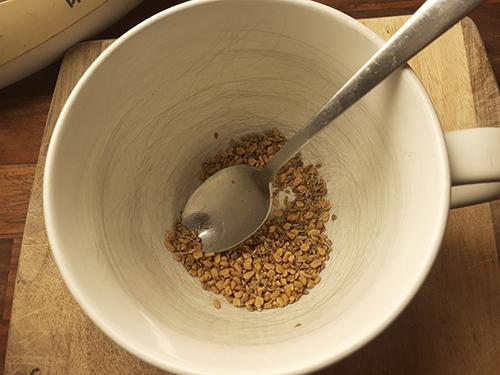 /thelostherbs.com/wp-content/uploads/2021/11/My-Herbal-Mixture-for-Chronic-Cough-Step-4-300x225.jpg" target="_blank">https://thelostherbs.com/wp-content/uploads/2021/1...ronic-Cough-Step-4-300x225.jpg 300w" width="500" />
 /thelostherbs.com/wp-content/uploads/2021/11/My-Herbal-Mixture-for-Chronic-Cough-Step-5-300x228.jpg" target="_blank">https://thelostherbs.com/wp-content/uploads/2021/1...ronic-Cough-Step-5-300x228.jpg 300w" width="500" />
 /thelostherbs.com/wp-content/uploads/2021/11/My-Herbal-Mixture-for-Chronic-Cough-Step-6.2-300x225.jpg" target="_blank">https://thelostherbs.com/wp-content/uploads/2021/1...nic-Cough-Step-6.2-300x225.jpg 300w" width="500" />
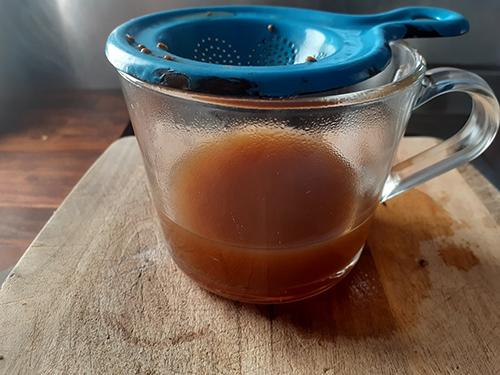 /thelostherbs.com/wp-content/uploads/2021/11/My-Herbal-Mixture-for-Chronic-Cough-Step-6.3-300x225.jpg" target="_blank">https://thelostherbs.com/wp-content/uploads/2021/1...nic-Cough-Step-6.3-300x225.jpg 300w" width="500" />
 /thelostherbs.com/wp-content/uploads/2021/11/My-Herbal-Mixture-for-Chronic-Cough-Step-7-300x220.jpg" target="_blank">https://thelostherbs.com/wp-content/uploads/2021/1...ronic-Cough-Step-7-300x220.jpg 300w" width="500" />
 /thelostherbs.com/wp-content/uploads/2021/11/My-Herbal-Mixture-for-Chronic-Cough-Step-8-300x225.jpg" target="_blank">https://thelostherbs.com/wp-content/uploads/2021/1...ronic-Cough-Step-8-300x225.jpg 300w" width="500" />
 /thelostherbs.com/wp-content/uploads/2021/11/My-Herbal-Mixture-for-Chronic-Cough-Step-9-300x221.jpg" target="_blank">https://thelostherbs.com/wp-content/uploads/2021/1...ronic-Cough-Step-9-300x221.jpg 300w" width="500" />
 /thelostherbs.com/wp-content/uploads/2021/11/My-Herbal-Mixture-for-Chronic-Cough-Step-10-300x225.jpg" target="_blank">https://thelostherbs.com/wp-content/uploads/2021/1...onic-Cough-Step-10-300x225.jpg 300w" width="500" />
 /thelostherbs.com/wp-content/uploads/2021/10/Mullein-benefits-232x300.jpg" target="_blank">https://thelostherbs.com/wp-content/uploads/2021/10/Mullein-benefits-232x300.jpg 232w" width="350" />
 /thelostherbs.com/wp-content/uploads/2021/10/What-happens-if-you-smoke-mullein-300x215.jpg" target="_blank">https://thelostherbs.com/wp-content/uploads/2021/1...-you-smoke-mullein-300x215.jpg 300w" width="350" />
 /thelostherbs.com/wp-content/uploads/2021/10/What-happens-if-you-smoke-mullein-Mullein-Leaves-300x169.jpg" target="_blank">https://thelostherbs.com/wp-content/uploads/2021/1...ein-Mullein-Leaves-300x169.jpg 300w" width="350" />
 /thelostherbs.com/wp-content/uploads/2021/10/What-happens-if-you-smoke-mullein-Mullein-bundles-300x212.jpg" target="_blank">https://thelostherbs.com/wp-content/uploads/2021/1...in-Mullein-bundles-300x212.jpg 300w" width="350" />
 /thelostherbs.com/wp-content/uploads/2021/10/What-happens-if-you-smoke-mullein-Dry-Leaves-300x225.jpg" target="_blank">https://thelostherbs.com/wp-content/uploads/2021/1...mullein-Dry-Leaves-300x225.jpg 300w" width="350" />
 /thelostherbs.com/wp-content/uploads/2021/10/What-happens-if-you-smoke-mullein-Air-Dry-Leaves-300x225.jpg" target="_blank">https://thelostherbs.com/wp-content/uploads/2021/1...ein-Air-Dry-Leaves-300x225.jpg 300w" width="350" />
 /thelostherbs.com/wp-content/uploads/2021/10/What-happens-if-you-smoke-mullein-Mullein-Leaves-in-a-Jar-300x225.jpg" target="_blank">https://thelostherbs.com/wp-content/uploads/2021/1...in-Leaves-in-a-Jar-300x225.jpg 300w" width="350" />
 /thelostherbs.com/wp-content/uploads/2021/11/50-Uses-of-Avocado-Eye-300x197.jpg" target="_blank">https://thelostherbs.com/wp-content/uploads/2021/1...ses-of-Avocado-Eye-300x197.jpg 300w" width="350" />
 /thelostherbs.com/wp-content/uploads/2021/11/50-Uses-of-Avocado-Vitamin-K-300x200.jpg" target="_blank">https://thelostherbs.com/wp-content/uploads/2021/1...-Avocado-Vitamin-K-300x200.jpg 300w" width="350" />
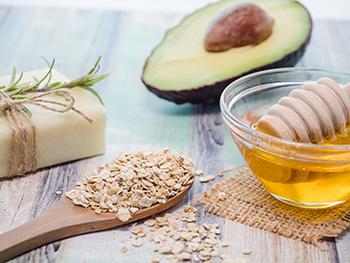 /thelostherbs.com/wp-content/uploads/2021/11/50-Uses-of-Avocado-Protects-the-brain-300x225.jpg" target="_blank">https://thelostherbs.com/wp-content/uploads/2021/1...Protects-the-brain-300x225.jpg 300w" width="350" />
 /thelostherbs.com/wp-content/uploads/2021/11/50-Uses-of-Avocado-Potassium-300x200.jpg" target="_blank">https://thelostherbs.com/wp-content/uploads/2021/1...-Avocado-Potassium-300x200.jpg 300w" width="350" />
 /thelostherbs.com/wp-content/uploads/2021/11/50-Uses-of-Avocado-Leukemia-300x193.jpg" target="_blank">https://thelostherbs.com/wp-content/uploads/2021/1...f-Avocado-Leukemia-300x193.jpg 300w" width="350" />
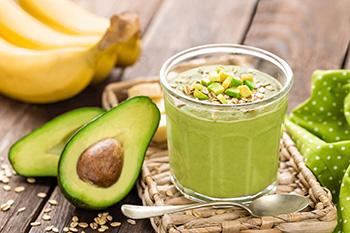 /thelostherbs.com/wp-content/uploads/2021/11/50-Uses-of-Avocado-Detox-300x200.jpg" target="_blank">https://thelostherbs.com/wp-content/uploads/2021/1...s-of-Avocado-Detox-300x200.jpg 300w" width="350" />
 /thelostherbs.com/wp-content/uploads/2021/11/50-Uses-of-Avocado-Avocado-Oil-300x200.jpg" target="_blank">https://thelostherbs.com/wp-content/uploads/2021/1...vocado-Avocado-Oil-300x200.jpg 300w" width="350" />
 /thelostherbs.com/wp-content/uploads/2021/11/50-Uses-of-Avocado-Skin-300x225.jpg" target="_blank">https://thelostherbs.com/wp-content/uploads/2021/1...es-of-Avocado-Skin-300x225.jpg 300w" width="350" />
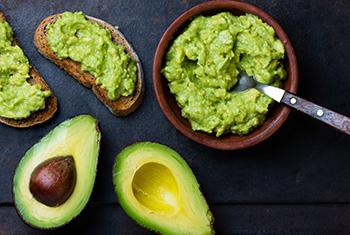 /thelostherbs.com/wp-content/uploads/2021/11/50-Uses-of-Avocado-healthy-1-300x201.jpg" target="_blank">https://thelostherbs.com/wp-content/uploads/2021/1...-Avocado-healthy-1-300x201.jpg 300w" width="350" />Adrenal fatigue occurs in four stages. The just of this disorder is that fat is required for hormone production. When you do not have enough fat in your diet then hormone production is affected. The key to reducing the chances of going past stage one is the consumption of fat. While fat has gotten a bad rap, our bodies need fat to function properly. The key is to consume healthy fats and this is where the avocado comes into the picture. The monounsaturated fatty acids in this fruit can meet this requirement without the negative consequences of animal fats. Eating avocado can provide the fat to keep hormone production going, which can reduce the chances of going past the first stage of adrenal fatigue.
 /thelostherbs.com/wp-content/uploads/2021/11/Turmeric-History-200x300.jpg" target="_blank">https://thelostherbs.com/wp-content/uploads/2021/11/Turmeric-History-200x300.jpg 200w" width="350" />
 /thelostherbs.com/wp-content/uploads/2021/11/Turmeric-Where-to-find-300x200.jpg" target="_blank">https://thelostherbs.com/wp-content/uploads/2021/1...eric-Where-to-find-300x200.jpg 300w" width="350" />While turmeric powder is widely available in grocery stores all over the world, fresh turmeric may be quite a challenge to find. This root vegetable is often grown in Asian countries, particularly in India, China, and Vietnam. It is also widely cultivated in Pakistan, Bangladesh, Sri Lanka, and Bangladesh.
 /thelostherbs.com/wp-content/uploads/2021/11/Turmeric-Identification-149x300.png" target="_blank">https://thelostherbs.com/wp-content/uploads/2021/1...ric-Identification-149x300.png 149w" width="350" />
 /thelostherbs.com/wp-content/uploads/2021/11/Growing-Turmeric-1-300x214.jpg" target="_blank">https://thelostherbs.com/wp-content/uploads/2021/11/Growing-Turmeric-1-300x214.jpg 300w" width="350" />The best time to plant turmeric is in September and October when the soil is still warm. Plant the rhizomes 4 inches deep in the soil. When planting several rhizomes, keep the plants 3 to 4 ft apart to allow enough room for each growth. The rhizomes should be planted with the sprouted parts facing up.
 /thelostherbs.com/wp-content/uploads/2021/11/Growing-Turmeric-2-300x173.jpg" target="_blank">https://thelostherbs.com/wp-content/uploads/2021/11/Growing-Turmeric-2-300x173.jpg 300w" width="350" />You can also start cultivating rhizomes indoors and only bring them outside soon after the last frost date. To do this, start 8 to 10 weeks before the average last frost date that your place has. Put individual rhizomes horizontally in a seed-starter tray. Make sure that this tray is well-draining. Cover the rhizomes with 2 inches of medium and keep the tray warm at 80 to 85°F.
 /thelostherbs.com/wp-content/uploads/2021/11/Growing-Turmeric-3-300x256.jpg" target="_blank">https://thelostherbs.com/wp-content/uploads/2021/11/Growing-Turmeric-3-300x256.jpg 300w" width="350" />Preserve the moisture but make sure that you do not overload the plants with it. Transplant the sprouted rhizomes once the last frost passed. Water the turmeric an inch of water per week when there is no rain. Do not overwater since the roots may rot. Also, maintain a pH level of 4.5 to 7.5.
 /thelostherbs.com/wp-content/uploads/2021/11/Harvesting-Turmeric-300x295.jpg" target="_blank">https://thelostherbs.com/wp-content/uploads/2021/11/Harvesting-Turmeric-300x295.jpg 300w" width="350" />The main indication that turmeric is ready for harvesting is when it starts to wilt. This usually happens around 7 to 10 months after planting. When you see the stem and leaves turning brown, gently dig up the plant. Be careful when digging since you do not want to damage the rhizomes. Cut the foliage an inch above the roots. Wash the roots thoroughly and this will be the fresh turmeric that you can use for various culinary and medicinal applications.
 /thelostherbs.com/wp-content/uploads/2021/10/Where-to-Find-Cramp-Bark-300x200.jpg" target="_blank">https://thelostherbs.com/wp-content/uploads/2021/1...to-Find-Cramp-Bark-300x200.jpg 300w" width="350" />Cramp Bark is grown for its ornamental and wildlife value. There are many cultivars of the European Viburnum opulus, known for their large snowball flower clusters, vibrant fall color, and persistent bright red fruit. For this reason, they are a common landscape plant.
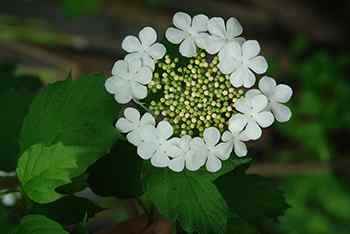 /thelostherbs.com/wp-content/uploads/2021/10/Cramp-Bark-Flower-300x201.jpg" target="_blank">https://thelostherbs.com/wp-content/uploads/2021/10/Cramp-Bark-Flower-300x201.jpg 300w" width="350" />
 /thelostherbs.com/wp-content/uploads/2021/10/Cramp-Bark-leaf-300x200.jpg" target="_blank">https://thelostherbs.com/wp-content/uploads/2021/10/Cramp-Bark-leaf-300x200.jpg 300w" width="350" />
 /thelostherbs.com/wp-content/uploads/2021/10/Cramp-Bark-Berry-300x200.jpg" target="_blank">https://thelostherbs.com/wp-content/uploads/2021/10/Cramp-Bark-Berry-300x200.jpg 300w" width="350" />
 /thelostherbs.com/wp-content/uploads/2021/10/Cramp-Bark-Harvest-300x184.jpg" target="_blank">https://thelostherbs.com/wp-content/uploads/2021/10/Cramp-Bark-Harvest-300x184.jpg 300w" width="350" />Harvest fruit from natural stands sparingly as this fruit is an important emergency food for winter wildlife. As consuming large quantities of cramp bark fruit may cause stomach discomfort, this is a win-win.
 /thelostherbs.com/wp-content/uploads/2021/10/Harvest-Cramp-Bark-300x200.jpg" target="_blank">https://thelostherbs.com/wp-content/uploads/2021/10/Harvest-Cramp-Bark-300x200.jpg 300w" width="350" />
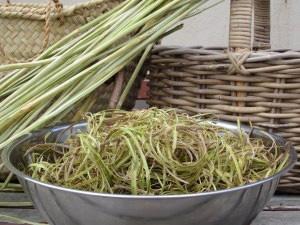
 /thelostherbs.com/wp-content/uploads/2021/10/Cramp-Bark-Natural-Remedies-Tea-300x216.jpg" target="_blank">https://thelostherbs.com/wp-content/uploads/2021/1...tural-Remedies-Tea-300x216.jpg 300w" width="350" />High in vitamin C, cramp bark fruit may be used in juice, jams, jellies, sauces, and preserves.
 /thelostherbs.com/wp-content/uploads/2021/10/Cramp-Bark-Natural-Remedies-300x225.jpg" target="_blank">https://thelostherbs.com/wp-content/uploads/2021/1...k-Natural-Remedies-300x225.jpg 300w" width="350" />A valuable wildlife, decorative, food, and medicinal plant, the bark of cramp bark has many uses in natural remedies.
 /thelostherbs.com/wp-content/uploads/2021/10/Cramp-Bark-Oil-Step-1-300x225.jpg" target="_blank">https://thelostherbs.com/wp-content/uploads/2021/10/Cramp-Bark-Oil-Step-1-300x225.jpg 300w" width="500" />
 /thelostherbs.com/wp-content/uploads/2021/10/Cramp-Bark-Oil-Step-2-300x208.jpg" target="_blank">https://thelostherbs.com/wp-content/uploads/2021/10/Cramp-Bark-Oil-Step-2-300x208.jpg 300w" width="500" />
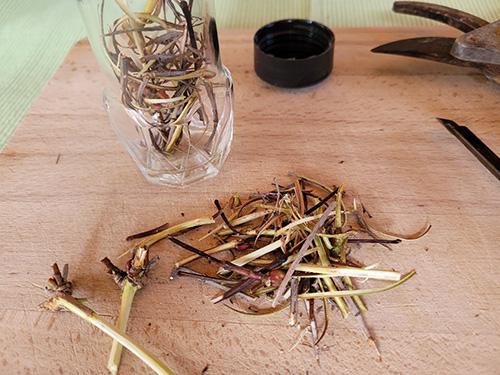 /thelostherbs.com/wp-content/uploads/2021/10/Cramp-Bark-Oil-Step-3-300x225.jpg" target="_blank">https://thelostherbs.com/wp-content/uploads/2021/10/Cramp-Bark-Oil-Step-3-300x225.jpg 300w" width="500" />
 /thelostherbs.com/wp-content/uploads/2021/10/Cramp-Bark-Oil-Step-4-300x209.jpg" target="_blank">https://thelostherbs.com/wp-content/uploads/2021/10/Cramp-Bark-Oil-Step-4-300x209.jpg 300w" width="500" />
 /thelostherbs.com/wp-content/uploads/2021/10/Cramp-Bark-Oil-Step-5-300x201.jpg" target="_blank">https://thelostherbs.com/wp-content/uploads/2021/10/Cramp-Bark-Oil-Step-5-300x201.jpg 300w" width="500" />
 /thelostherbs.com/wp-content/uploads/2021/10/Dried-Cramp-Bark-300x201.jpg" target="_blank">https://thelostherbs.com/wp-content/uploads/2021/10/Dried-Cramp-Bark-300x201.jpg 300w" width="350" />Cramp bark can be preserved in several ways. Harvested bark can be used immediately after harvest and preserved as a tincture or infused in oil.


 /thelostherbs.com/wp-content/uploads/2021/10/How-to-Make-Pine-Cough-Syrup-Pinus-Strobus-300x294.jpg" target="_blank">https://thelostherbs.com/wp-content/uploads/2021/1...yrup-Pinus-Strobus-300x294.jpg 300w" width="350" />
 /thelostherbs.com/wp-content/uploads/2021/10/How-to-Make-Pine-Cough-Syrup-Ingredients-300x223.jpg" target="_blank">https://thelostherbs.com/wp-content/uploads/2021/1...-Syrup-Ingredients-300x223.jpg 300w" width="350" />
 /thelostherbs.com/wp-content/uploads/2021/10/How-to-Make-Pine-Cough-Syrup.jpg" target="_blank">https://thelostherbs.com/wp-content/uploads/2021/10/How-to-Make-Pine-Cough-Syrup.jpg 500w" width="350" />Lemon (optional)
 /thelostherbs.com/wp-content/uploads/2021/10/How-to-Make-Pine-Cough-Syrup-Step-1-300x221.jpg" target="_blank">https://thelostherbs.com/wp-content/uploads/2021/1...Cough-Syrup-Step-1-300x221.jpg 300w" width="500" />
 /thelostherbs.com/wp-content/uploads/2021/10/How-to-Make-Pine-Cough-Syrup-Step-3-300x223.jpg" target="_blank">https://thelostherbs.com/wp-content/uploads/2021/1...Cough-Syrup-Step-3-300x223.jpg 300w" width="500" />
 /thelostherbs.com/wp-content/uploads/2021/10/How-to-Make-Pine-Cough-Syrup-Step-4-300x223.jpg" target="_blank">https://thelostherbs.com/wp-content/uploads/2021/1...Cough-Syrup-Step-4-300x223.jpg 300w" width="500" />
 /thelostherbs.com/wp-content/uploads/2021/10/How-to-Make-Pine-Cough-Syrup-Step-5-300x223.jpg" target="_blank">https://thelostherbs.com/wp-content/uploads/2021/1...Cough-Syrup-Step-5-300x223.jpg 300w" width="500" />
 /thelostherbs.com/wp-content/uploads/2021/10/How-to-Make-Pine-Cough-Syrup-Step-6-300x224.jpg" target="_blank">https://thelostherbs.com/wp-content/uploads/2021/1...Cough-Syrup-Step-6-300x224.jpg 300w" width="500" />
 /thelostherbs.com/wp-content/uploads/2021/10/How-to-Make-Pine-Cough-Syrup-Step-7-300x223.jpg" target="_blank">https://thelostherbs.com/wp-content/uploads/2021/1...Cough-Syrup-Step-7-300x223.jpg 300w" width="500" />
 /thelostherbs.com/wp-content/uploads/2021/10/How-to-Make-Pine-Cough-Syrup-Step-8-300x223.jpg" target="_blank">https://thelostherbs.com/wp-content/uploads/2021/1...Cough-Syrup-Step-8-300x223.jpg 300w" width="500" />
 /thelostherbs.com/wp-content/uploads/2021/10/How-to-Make-Pine-Cough-Syrup-Step-9-300x224.jpg" target="_blank">https://thelostherbs.com/wp-content/uploads/2021/1...Cough-Syrup-Step-9-300x224.jpg 300w" width="500" />
 /thelostherbs.com/wp-content/uploads/2021/10/How-to-Make-Pine-Cough-Syrup-Step-10-300x206.jpg" target="_blank">https://thelostherbs.com/wp-content/uploads/2021/1...ough-Syrup-Step-10-300x206.jpg 300w" width="500" />
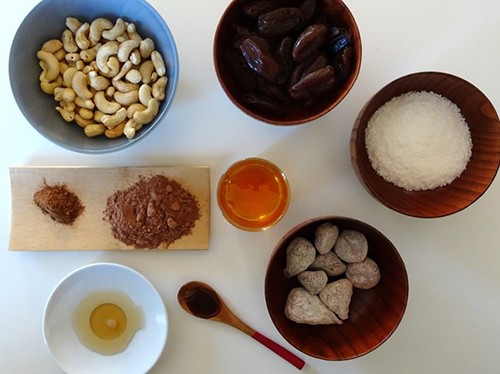 /thelostherbs.com/wp-content/uploads/2021/04/How-To-Make-Herb-Infused-Energy-Balls-Ingredients-300x224.jpg" target="_blank">https://thelostherbs.com/wp-content/uploads/2021/0...-Balls-Ingredients-300x224.jpg 300w" width="350" />
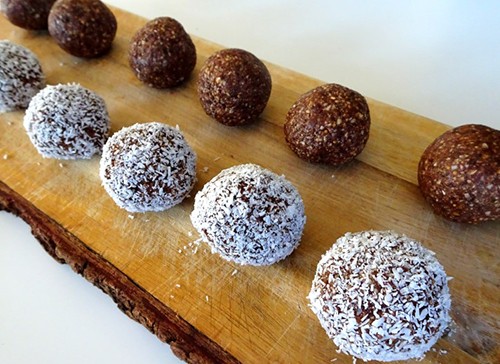 /thelostherbs.com/wp-content/uploads/2021/04/How-To-Make-Herb-Infused-Energy-Balls-Storage-300x218.jpg" target="_blank">https://thelostherbs.com/wp-content/uploads/2021/0...ergy-Balls-Storage-300x218.jpg 300w" width="350" />
 /thelostherbs.com/wp-content/uploads/2021/04/How-To-Make-Herb-Infused-Energy-Balls-Step-1-300x216.jpg" target="_blank">https://thelostherbs.com/wp-content/uploads/2021/0...nergy-Balls-Step-1-300x216.jpg 300w" width="500" />
 /thelostherbs.com/wp-content/uploads/2021/04/How-To-Make-Herb-Infused-Energy-Balls-Step-2-300x222.jpg" target="_blank">https://thelostherbs.com/wp-content/uploads/2021/0...nergy-Balls-Step-2-300x222.jpg 300w" width="500" />
 /thelostherbs.com/wp-content/uploads/2021/04/How-To-Make-Herb-Infused-Energy-Balls-Step-3-300x215.jpg" target="_blank">https://thelostherbs.com/wp-content/uploads/2021/0...nergy-Balls-Step-3-300x215.jpg 300w" width="500" />
 /thelostherbs.com/wp-content/uploads/2021/04/How-To-Make-Herb-Infused-Energy-Balls-Step-4-300x215.jpg" target="_blank">https://thelostherbs.com/wp-content/uploads/2021/0...nergy-Balls-Step-4-300x215.jpg 300w" width="500" />
 /thelostherbs.com/wp-content/uploads/2021/04/How-To-Make-Herb-Infused-Energy-Balls-Step-5-e1618299988648-300x195.jpg" target="_blank">https://thelostherbs.com/wp-content/uploads/2021/0...p-5-e1618299988648-300x195.jpg 300w" width="496" />
 /thelostherbs.com/wp-content/uploads/2021/10/Anti-Anxiety-Elixir-Step-1-300x203.jpg" target="_blank">https://thelostherbs.com/wp-content/uploads/2021/1...iety-Elixir-Step-1-300x203.jpg 300w" width="500" />
 /thelostherbs.com/wp-content/uploads/2021/10/Anti-Anxiety-Elixir-Step-2-300x225.jpg" target="_blank">https://thelostherbs.com/wp-content/uploads/2021/1...iety-Elixir-Step-2-300x225.jpg 300w" width="500" />
 /thelostherbs.com/wp-content/uploads/2021/10/Anti-Anxiety-Elixir-Step-3-300x225.jpg" target="_blank">https://thelostherbs.com/wp-content/uploads/2021/1...iety-Elixir-Step-3-300x225.jpg 300w" width="500" />
 /thelostherbs.com/wp-content/uploads/2021/10/Anti-Anxiety-Elixir-Step-4-300x225.jpg" target="_blank">https://thelostherbs.com/wp-content/uploads/2021/1...iety-Elixir-Step-4-300x225.jpg 300w" width="500" />
 /thelostherbs.com/wp-content/uploads/2021/10/Anti-Anxiety-Elixir-Step-6-300x225.jpg" target="_blank">https://thelostherbs.com/wp-content/uploads/2021/1...iety-Elixir-Step-6-300x225.jpg 300w" width="500" />
 /thelostherbs.com/wp-content/uploads/2021/10/Anti-Anxiety-Elixir-Step-7-300x202.jpg" target="_blank">https://thelostherbs.com/wp-content/uploads/2021/1...iety-Elixir-Step-7-300x202.jpg 300w" width="500" />
 /thelostherbs.com/wp-content/uploads/2021/10/Anti-Anxiety-Elixir-Step-8-300x206.jpg" target="_blank">https://thelostherbs.com/wp-content/uploads/2021/1...iety-Elixir-Step-8-300x206.jpg 300w" width="500" />
 /thelostherbs.com/wp-content/uploads/2021/10/Anti-Anxiety-Elixir-300x200.jpg" target="_blank">https://thelostherbs.com/wp-content/uploads/2021/10/Anti-Anxiety-Elixir-300x200.jpg 300w" width="500" />
 /thelostherbs.com/wp-content/uploads/2021/10/Reducing-Anxiety-Symptoms-300x105.jpg" target="_blank">https://thelostherbs.com/wp-content/uploads/2021/1...g-Anxiety-Symptoms-300x105.jpg 300w,
  /thelostherbs.com/wp-content/uploads/2021/10/When-painkillers-wont-be-available-try-This-White-Willow-300x200.jpg" target="_blank">https://thelostherbs.com/wp-content/uploads/2021/1...-This-White-Willow-300x200.jpg 300w" width="350" />
 /thelostherbs.com/wp-content/uploads/2021/10/When-painkillers-wont-be-available-try-This-White-Willow-tea-300x210.jpg" target="_blank">https://thelostherbs.com/wp-content/uploads/2021/1...s-White-Willow-tea-300x210.jpg 300w" width="350" />
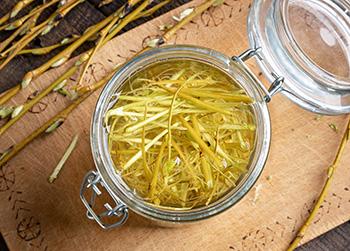 /thelostherbs.com/wp-content/uploads/2021/10/When-painkillers-wont-be-available-try-This-White-Willow-tincture-300x215.jpg" target="_blank">https://thelostherbs.com/wp-content/uploads/2021/1...te-Willow-tincture-300x215.jpg 300w" width="350" />Tincture: This does require fresh white willow that is harvested in the spring. What you will need to do is to harvest enough fresh bark so that it fills a jar 2/3 full of the bark. Then, cover the bark with vodka making sure that you leave one inch from the top of the jar. Screw the lid on and shake the jar so that the vodka and bark mix. Allow it to set for several months and shake often. After the vodka/white willow bark has steeped to your liking, strain the bark out and store your tincture in amber bottles with droppers. When you need some pain relief, simply add a few drops of your DIY white willow tincture to the water and drink. Keep in mind when using this technique, only start with one or two drops and adjust as needed.
 /thelostherbs.com/wp-content/uploads/2021/10/When-painkillers-wont-be-available-try-This-Ginger-Tea.jpg" target="_blank">https://thelostherbs.com/wp-content/uploads/2021/1...ilable-try-This-Ginger-Tea.jpg 500w" width="350" />
 /thelostherbs.com/wp-content/uploads/2021/10/When-painkillers-wont-be-available-try-This-Lavender-Oil.jpg" target="_blank">https://thelostherbs.com/wp-content/uploads/2021/1...able-try-This-Lavender-Oil.jpg 500w" width="350" />Inhaling lavender essential oil can help relieve many types of pain, such as migraines. If inhaled three days before your menstrual cycle, the stomach pain that is associated with the cycle is reduced. Now, if you have pain during your menstrual cycle, consider getting an aromatherapy massage that includes lavender oil. The combination of the massage and aroma help relieve cramps caused by the menstrual cycle.
 /thelostherbs.com/wp-content/uploads/2021/10/When-painkillers-wont-be-available-try-This-Golden-Milk-300x179.jpg" target="_blank">https://thelostherbs.com/wp-content/uploads/2021/1...y-This-Golden-Milk-300x179.jpg 300w" width="500" />I know at this point you are scratching your head going, golden milk!
 /thelostherbs.com/wp-content/uploads/2021/10/When-painkillers-wont-be-available-try-This-Pineapple.jpg" target="_blank">https://thelostherbs.com/wp-content/uploads/2021/1...ailable-try-This-Pineapple.jpg 500w" width="350" />
 /thelostherbs.com/wp-content/uploads/2021/10/Dill-Identification-178x300.png" target="_blank">https://thelostherbs.com/wp-content/uploads/2021/10/Dill-Identification-178x300.png 178w" width="350" />
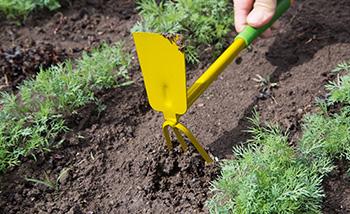 /thelostherbs.com/wp-content/uploads/2021/10/Growing-Dill-1-300x183.jpg" target="_blank">https://thelostherbs.com/wp-content/uploads/2021/10/Growing-Dill-1-300x183.jpg 300w" width="350" />
 /thelostherbs.com/wp-content/uploads/2021/10/Growing-Dill-2-300x200.jpg" target="_blank">https://thelostherbs.com/wp-content/uploads/2021/10/Growing-Dill-2-300x200.jpg 300w" width="350" />
 /thelostherbs.com/wp-content/uploads/2021/10/Growing-Dill-3-300x176.jpg" target="_blank">https://thelostherbs.com/wp-content/uploads/2021/10/Growing-Dill-3-300x176.jpg 300w" width="350" />If dill is allowed to go to seed, the ripe seeds easily fall off the plant. The seeds may remain in the soil for 3 to 10 years. They may reliably germinate under favorable moist conditions. In the past, I had trouble growing dill. Once I allowed them into the vegetable patch that stays well-watered in the spring, dill became a prolific self-seeder. The lovely uniquely dill aroma flavors many summer mornings, as I freely admit, they are everywhere.
 /thelostherbs.com/wp-content/uploads/2021/10/Harvesting-Dill-1-300x201.jpg" target="_blank">https://thelostherbs.com/wp-content/uploads/2021/10/Harvesting-Dill-1-300x201.jpg 300w" width="350" />Catching the harvest early in the season has several benefits. At least here in my garden, the spring dill harvest is best for flavor. If I’m lucky enough, I get to the plants before the aphids which makes harvesting and processing much easier.
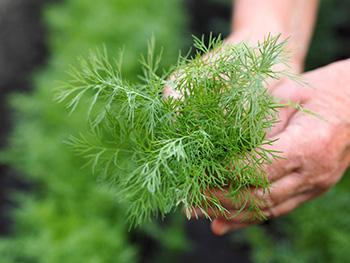 /thelostherbs.com/wp-content/uploads/2021/10/Harvesting-Dill-2-300x225.jpg" target="_blank">https://thelostherbs.com/wp-content/uploads/2021/10/Harvesting-Dill-2-300x225.jpg 300w" width="350" />To process the harvested dill, pinch off all the best-looking leaves from the plants. Quickly douse in cold salted water and shake off excess water. Once dry enough, finely chop the needle-like leaves. These can then be dried or frozen for use throughout the next 6 months to a year. I think frozen is better, so I place the freshly chopped leaves in a recycled glass jar and throw it in the freezer for future use.
 /thelostherbs.com/wp-content/uploads/2021/10/Dill-Essential-Oil-300x207.jpg" target="_blank">https://thelostherbs.com/wp-content/uploads/2021/10/Dill-Essential-Oil-300x207.jpg 300w" width="350" />
 /thelostherbs.com/wp-content/uploads/2021/10/Dill-and-Garlic-Dip-step-1-300x225.jpg" target="_blank">https://thelostherbs.com/wp-content/uploads/2021/1...-Garlic-Dip-step-1-300x225.jpg 300w" width="500" />
 /thelostherbs.com/wp-content/uploads/2021/10/Dill-and-Garlic-Dip-step-2-300x212.jpg" target="_blank">https://thelostherbs.com/wp-content/uploads/2021/1...-Garlic-Dip-step-2-300x212.jpg 300w" width="500" />
 /thelostherbs.com/wp-content/uploads/2021/10/Dill-and-Garlic-Dip-step-3-300x217.jpg" target="_blank">https://thelostherbs.com/wp-content/uploads/2021/1...-Garlic-Dip-step-3-300x217.jpg 300w" width="500" />
 /thelostherbs.com/wp-content/uploads/2021/10/Dill-and-Garlic-Dip-step-5-300x225.jpg" target="_blank">https://thelostherbs.com/wp-content/uploads/2021/1...-Garlic-Dip-step-5-300x225.jpg 300w" width="500" />
 /thelostherbs.com/wp-content/uploads/2021/10/Dill-and-Garlic-Dip-step-4-300x225.jpg" target="_blank">https://thelostherbs.com/wp-content/uploads/2021/1...-Garlic-Dip-step-4-300x225.jpg 300w" width="500" />
 /thelostherbs.com/wp-content/uploads/2021/10/Dill-and-Garlic-Dip-step-6-300x210.jpg" target="_blank">https://thelostherbs.com/wp-content/uploads/2021/1...-Garlic-Dip-step-6-300x210.jpg 300w" width="500" />
 /thelostherbs.com/wp-content/uploads/2021/10/Dill-Seed-Tea-step-1-300x225.jpg" target="_blank">https://thelostherbs.com/wp-content/uploads/2021/10/Dill-Seed-Tea-step-1-300x225.jpg 300w" width="500" />
 /thelostherbs.com/wp-content/uploads/2021/10/Dill-Seed-Tea-step-2-300x211.jpg" target="_blank">https://thelostherbs.com/wp-content/uploads/2021/10/Dill-Seed-Tea-step-2-300x211.jpg 300w" width="500" />
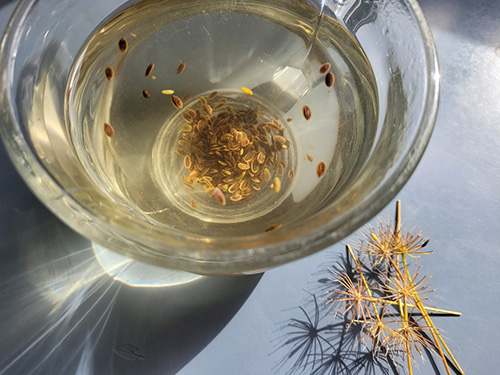 /thelostherbs.com/wp-content/uploads/2021/10/Dill-Seed-Tea-step-3-300x225.jpg" target="_blank">https://thelostherbs.com/wp-content/uploads/2021/10/Dill-Seed-Tea-step-3-300x225.jpg 300w" width="500" />
 /thelostherbs.com/wp-content/uploads/2021/10/Freeze-Dil-300x231.jpg" target="_blank">https://thelostherbs.com/wp-content/uploads/2021/10/Freeze-Dil-300x231.jpg 300w" width="350" />
 /thelostherbs.com/wp-content/uploads/2021/10/Preserve-Dill-300x201.jpg" target="_blank">https://thelostherbs.com/wp-content/uploads/2021/10/Preserve-Dill-300x201.jpg 300w" width="350" />
 /thelostherbs.com/wp-content/uploads/2021/04/Homemade-Lions-Mane-Tincture-for-Brain-Fog-About-230x300.jpg" target="_blank">https://thelostherbs.com/wp-content/uploads/2021/0...or-Brain-Fog-About-230x300.jpg 230w" width="350" />
 /thelostherbs.com/wp-content/uploads/2021/04/Homemade-Lions-Mane-Tincture-for-Brain-Fog-Where-to-Find-300x207.jpg" target="_blank">https://thelostherbs.com/wp-content/uploads/2021/0...-Fog-Where-to-Find-300x207.jpg 300w" width="350" />Wanting to start on your mushroom foraging skills? Lion’s Mane is a wonderful safe way to begin. Apparently, there are no poisonous look-alikes. This is important as there are many poisonous mushrooms out there! Lion’s Mane season is in the fall in North America. It notably grows on dead and decaying hardwood logs.
 /thelostherbs.com/wp-content/uploads/2021/04/Homemade-Lions-Mane-Tincture-for-Brain-Fog-Step1.1-300x205.jpg" target="_blank">https://thelostherbs.com/wp-content/uploads/2021/0...-Brain-Fog-Step1.1-300x205.jpg 300w" width="500" />
 /thelostherbs.com/wp-content/uploads/2021/04/Homemade-Lions-Mane-Tincture-for-Brain-Fog-Step1.2-300x208.jpg" target="_blank">https://thelostherbs.com/wp-content/uploads/2021/0...-Brain-Fog-Step1.2-300x208.jpg 300w" width="500" />
 /thelostherbs.com/wp-content/uploads/2021/04/Homemade-Lions-Mane-Tincture-for-Brain-Fog-Step1.3-300x214.jpg" target="_blank">https://thelostherbs.com/wp-content/uploads/2021/0...-Brain-Fog-Step1.3-300x214.jpg 300w" width="500" />
 /thelostherbs.com/wp-content/uploads/2021/04/Homemade-Lions-Mane-Tincture-for-Brain-Fog-Step1.4-300x201.jpg" target="_blank">https://thelostherbs.com/wp-content/uploads/2021/0...-Brain-Fog-Step1.4-300x201.jpg 300w" width="500" />
 /thelostherbs.com/wp-content/uploads/2021/04/Homemade-Lions-Mane-Tincture-for-Brain-Fog-Step1.5-300x209.jpg" target="_blank">https://thelostherbs.com/wp-content/uploads/2021/0...-Brain-Fog-Step1.5-300x209.jpg 300w" width="500" />
 /thelostherbs.com/wp-content/uploads/2021/04/Homemade-Lions-Mane-Tincture-for-Brain-Fog-Step1.6-300x225.jpg" target="_blank">https://thelostherbs.com/wp-content/uploads/2021/0...-Brain-Fog-Step1.6-300x225.jpg 300w" width="500" />
 /thelostherbs.com/wp-content/uploads/2021/04/Homemade-Lions-Mane-Tincture-for-Brain-Fog-Step1.7-300x225.jpg" target="_blank">https://thelostherbs.com/wp-content/uploads/2021/0...-Brain-Fog-Step1.7-300x225.jpg 300w" width="500" />
 /thelostherbs.com/wp-content/uploads/2021/04/Homemade-Lions-Mane-Tincture-for-Brain-Fog-Step2-300x225.jpg" target="_blank">https://thelostherbs.com/wp-content/uploads/2021/0...or-Brain-Fog-Step2-300x225.jpg 300w" width="500" />
 /thelostherbs.com/wp-content/uploads/2021/04/Homemade-Lions-Mane-Tincture-for-Brain-Fog-Step2.1-300x225.jpg" target="_blank">https://thelostherbs.com/wp-content/uploads/2021/0...-Brain-Fog-Step2.1-300x225.jpg 300w" width="500" />
 /thelostherbs.com/wp-content/uploads/2021/04/Homemade-Lions-Mane-Tincture-for-Brain-Fog-Step2.2-300x199.jpg" target="_blank">https://thelostherbs.com/wp-content/uploads/2021/0...-Brain-Fog-Step2.2-300x199.jpg 300w" width="500" />
 /thelostherbs.com/wp-content/uploads/2021/04/Homemade-Lions-Mane-Tincture-for-Brain-Fog-Step2.3-300x225.jpg" target="_blank">https://thelostherbs.com/wp-content/uploads/2021/0...-Brain-Fog-Step2.3-300x225.jpg 300w" width="500" />
 /thelostherbs.com/wp-content/uploads/2021/04/Homemade-Lions-Mane-Tincture-for-Brain-Fog-Step2.4-300x225.jpg" target="_blank">https://thelostherbs.com/wp-content/uploads/2021/0...-Brain-Fog-Step2.4-300x225.jpg 300w" width="500" />
 /thelostherbs.com/wp-content/uploads/2021/04/Homemade-Lions-Mane-Tincture-for-Brain-Fog-Step2.5-300x225.jpg" target="_blank">https://thelostherbs.com/wp-content/uploads/2021/0...-Brain-Fog-Step2.5-300x225.jpg 300w" width="500" />
 /thelostherbs.com/wp-content/uploads/2021/04/Homemade-Lions-Mane-Tincture-for-Brain-Fog-300x185.jpg" target="_blank">https://thelostherbs.com/wp-content/uploads/2021/0...ture-for-Brain-Fog-300x185.jpg 300w" width="500" />
 /thelostherbs.com/wp-content/uploads/2021/04/Juglas-Nigra-300x211.jpg" target="_blank">https://thelostherbs.com/wp-content/uploads/2021/04/Juglas-Nigra-300x211.jpg 300w" width="350" />Black Walnut produces a chemical in its leaves, trunk, and roots called juglone. Juglone can cause damage or death to plants. While juglone is present in all walnut trees, the highest concentrations appear in the Black Walnut variety. Juglone helps protect walnut trees from other plants that may be competing for the same resources. So, while this is good for the Black Walnut tree, it is bad for you if you want to grow plants close by it. Juglone is concentrated in the soil beneath the drip line of the tree. The drip line is the area from the trunk to the edge of the branches. In a mature black walnut tree that can span 50 feet!
 /thelostherbs.com/wp-content/uploads/2021/04/The-Killer-Tree-You-Should-Never-Have-In-Your-Backyard-Leaf-300x233.jpg" target="_blank">https://thelostherbs.com/wp-content/uploads/2021/0...Your-Backyard-Leaf-300x233.jpg 300w" width="350" />All species of walnuts have feathery pinnate leaves. The black walnut has between 15-23 leaflets on each twig. They are in pairs. The black walnut doesn’t have the extra leaf at the tip that other varieties have.
 /thelostherbs.com/wp-content/uploads/2021/04/The-Killer-Tree-You-Should-Never-Have-In-Your-Backyard-Trunk-300x183.jpg" target="_blank">https://thelostherbs.com/wp-content/uploads/2021/0...our-Backyard-Trunk-300x183.jpg 300w" width="350" />Black walnut bark is dark and deeply fissured. If you remove the bark, you can see the dark brown wood beneath it.
 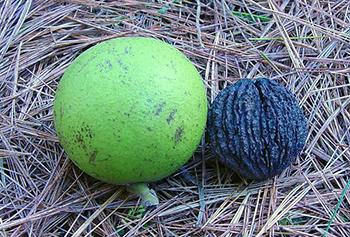 /thelostherbs.com/wp-content/uploads/2021/04/The-Killer-Tree-You-Should-Never-Have-In-Your-Backyard-Fruit-300x203.jpg" target="_blank">https://thelostherbs.com/wp-content/uploads/2021/0...our-Backyard-Fruit-300x203.jpg 300w" width="350" />
 /thelostherbs.com/wp-content/uploads/2021/04/The-Killer-Tree-You-Should-Never-Have-In-Your-Backyard-Benefits-300x276.jpg" target="_blank">https://thelostherbs.com/wp-content/uploads/2021/0...-Backyard-Benefits-300x276.jpg 300w" width="350" />
 /thelostherbs.com/wp-content/uploads/2021/04/The-Killer-Tree-You-Should-Never-Have-In-Your-Backyard-Manchineel-Tree-300x232.jpg" target="_blank">https://thelostherbs.com/wp-content/uploads/2021/0...rd-Manchineel-Tree-300x232.jpg 300w" width="350" />The manchineel tree, Hippomane mancinella, is native to the tropical regions of southern North America and northern South America. In the US, it is found only in Florida. It grows mostly along beaches or in swampy areas. It grows as tall as 50 feet tall and has fruit that resembles small green apples.
 /thelostherbs.com/wp-content/uploads/2021/04/How-to-Treat-Nail-Fungus-300x206.jpg" target="_blank">https://thelostherbs.com/wp-content/uploads/2021/0...-Treat-Nail-Fungus-300x206.jpg 300w" width="350" />When treating most fungal infections, avoid using water-based moisturizers and lotions, since this trapped moisture can exacerbate the condition.
 /thelostherbs.com/wp-content/uploads/2021/04/Homemade-Nail-Fungus-Cream-Plants-That-Treat-Nail-Fungus-300x203.jpg" target="_blank">https://thelostherbs.com/wp-content/uploads/2021/0...-Treat-Nail-Fungus-300x203.jpg 300w" width="350" />
 /thelostherbs.com/wp-content/uploads/2021/04/Homemade-Nail-Fungus-Cream-Ingredients-300x203.jpg" target="_blank">https://thelostherbs.com/wp-content/uploads/2021/0...-Cream-Ingredients-300x203.jpg 300w" width="350" />
 /thelostherbs.com/wp-content/uploads/2021/04/Homemade-Nail-Fungus-Cream-Optional-Step-300x203.jpg" target="_blank">https://thelostherbs.com/wp-content/uploads/2021/0...ream-Optional-Step-300x203.jpg 300w" width="500" />
 /thelostherbs.com/wp-content/uploads/2021/04/Homemade-Nail-Fungus-Cream-Step-1-300x215.jpg" target="_blank">https://thelostherbs.com/wp-content/uploads/2021/0...ungus-Cream-Step-1-300x215.jpg 300w" width="500" />
 /thelostherbs.com/wp-content/uploads/2021/04/Homemade-Nail-Fungus-Cream-Step-2-300x203.jpg" target="_blank">https://thelostherbs.com/wp-content/uploads/2021/0...ungus-Cream-Step-2-300x203.jpg 300w" width="500" />
 /thelostherbs.com/wp-content/uploads/2021/09/Juice-Recipes-for-Weight-Loss.jpg" target="_blank">https://thelostherbs.com/wp-content/uploads/2021/09/Juice-Recipes-for-Weight-Loss.jpg 500w" width="350" />
 /thelostherbs.com/wp-content/uploads/2021/09/Juices-for-Weigh-Loss.jpg" target="_blank">https://thelostherbs.com/wp-content/uploads/2021/09/Juices-for-Weigh-Loss.jpg 500w" width="350" />
 /thelostherbs.com/wp-content/uploads/2021/09/Juice-Recipes-for-Weight-Loss-1.1.jpg" target="_blank">https://thelostherbs.com/wp-content/uploads/2021/0...ecipes-for-Weight-Loss-1.1.jpg 500w" width="350" />
 /thelostherbs.com/wp-content/uploads/2021/09/Juice-Recipes-for-Weight-Loss-1.2-300x224.jpg" target="_blank">https://thelostherbs.com/wp-content/uploads/2021/0...or-Weight-Loss-1.2-300x224.jpg 300w" width="500" />
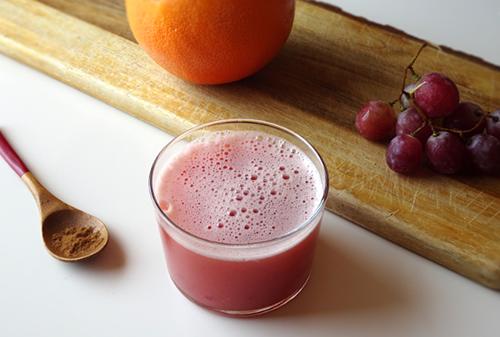 /thelostherbs.com/wp-content/uploads/2021/09/Juice-Recipes-for-Weight-Loss-1.4-300x202.jpg" target="_blank">https://thelostherbs.com/wp-content/uploads/2021/0...or-Weight-Loss-1.4-300x202.jpg 300w" width="500" />
 /thelostherbs.com/wp-content/uploads/2021/09/Juice-Recipes-for-Weight-Loss-2.1.jpg" target="_blank">https://thelostherbs.com/wp-content/uploads/2021/0...ecipes-for-Weight-Loss-2.1.jpg 500w" width="350" />
 /thelostherbs.com/wp-content/uploads/2021/09/Juice-Recipes-for-Weight-Loss-2.2-300x222.jpg" target="_blank">https://thelostherbs.com/wp-content/uploads/2021/0...or-Weight-Loss-2.2-300x222.jpg 300w" width="500" />
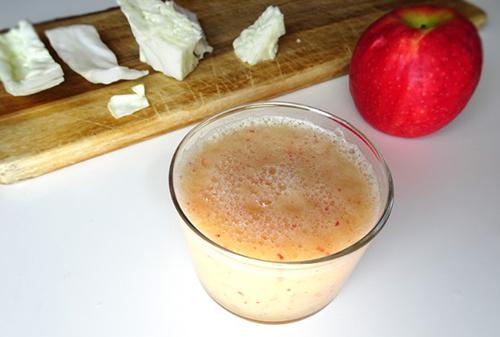 /thelostherbs.com/wp-content/uploads/2021/09/Juice-Recipes-for-Weight-Loss-2.4-300x202.jpg" target="_blank">https://thelostherbs.com/wp-content/uploads/2021/0...or-Weight-Loss-2.4-300x202.jpg 300w" width="500" />
 /thelostherbs.com/wp-content/uploads/2021/09/Juice-Recipes-for-Weight-Loss-3.1.jpg" target="_blank">https://thelostherbs.com/wp-content/uploads/2021/0...ecipes-for-Weight-Loss-3.1.jpg 500w" width="350" />
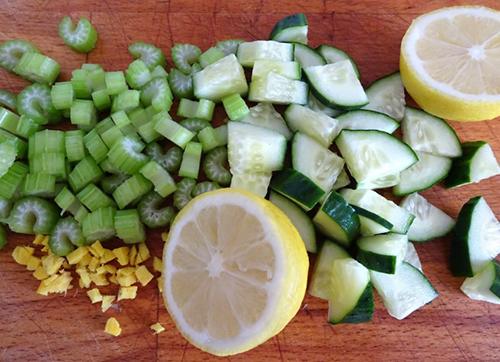 /thelostherbs.com/wp-content/uploads/2021/09/Juice-Recipes-for-Weight-Loss-3.4-300x217.jpg" target="_blank">https://thelostherbs.com/wp-content/uploads/2021/0...or-Weight-Loss-3.4-300x217.jpg 300w" width="500" />
 /thelostherbs.com/wp-content/uploads/2021/09/Juice-Recipes-for-Weight-Loss-3.6-300x224.jpg" target="_blank">https://thelostherbs.com/wp-content/uploads/2021/0...or-Weight-Loss-3.6-300x224.jpg 300w" width="500" />
 /thelostherbs.com/wp-content/uploads/2021/09/How-to-Treat-Cough-With-Beets-Fruit-and-Vegetable-Juice-Ingredients-300x219.jpg" target="_blank">https://thelostherbs.com/wp-content/uploads/2021/0...-Juice-Ingredients-300x219.jpg 300w" width="350" />
 /thelostherbs.com/wp-content/uploads/2021/09/How-to-Treat-Cough-With-Beets-Fruit-and-Vegetable-Juice-Step-1-300x221.jpg" target="_blank">https://thelostherbs.com/wp-content/uploads/2021/0...table-Juice-Step-1-300x221.jpg 300w" width="500" />
 /thelostherbs.com/wp-content/uploads/2021/09/How-to-Treat-Cough-With-Beets-Fruit-and-Vegetable-Juice-Step-2-300x189.jpg" target="_blank">https://thelostherbs.com/wp-content/uploads/2021/0...table-Juice-Step-2-300x189.jpg 300w" width="500" />
 /thelostherbs.com/wp-content/uploads/2021/09/How-to-Treat-Cough-With-Beets-Fruit-and-Vegetable-Juice-Step-3-300x200.jpg" target="_blank">https://thelostherbs.com/wp-content/uploads/2021/0...table-Juice-Step-3-300x200.jpg 300w" width="500" />
 /thelostherbs.com/wp-content/uploads/2021/09/How-to-Treat-Cough-With-Beets-and-Cinnamon-Step-1.jpg" target="_blank">https://thelostherbs.com/wp-content/uploads/2021/0...-Beets-and-Cinnamon-Step-1.jpg 500w" width="350" />If you want a simple beet recipe without using too many ingredients, then this one is for you. The juice is loaded with beet’s antioxidant properties. It is also very easy to do and can help with your cough problems. Cinnamon, on the other hand, has antioxidant, antibacterial, and anti-infectious properties that help with cough, common cold, and nasal congestion.
 /thelostherbs.com/wp-content/uploads/2021/09/How-to-Treat-Cough-With-Beets-and-Cinnamon-300x214.jpg" target="_blank">https://thelostherbs.com/wp-content/uploads/2021/0...Beets-and-Cinnamon-300x214.jpg 300w" width="500" />
 /thelostherbs.com/wp-content/uploads/2021/09/How-to-Treat-Cough-With-Beets-and-Lemon-Ingredients-300x213.jpg" target="_blank">https://thelostherbs.com/wp-content/uploads/2021/0...-Lemon-Ingredients-300x213.jpg 300w" width="350" />
 /thelostherbs.com/wp-content/uploads/2021/09/How-to-Treat-Cough-With-Beets-and-Lemon-Step-1-300x196.jpg" target="_blank">https://thelostherbs.com/wp-content/uploads/2021/0...s-and-Lemon-Step-1-300x196.jpg 300w" width="500" />
 /thelostherbs.com/wp-content/uploads/2021/09/How-to-Treat-Cough-With-Beets-and-Lemon-Step-2-300x218.jpg" target="_blank">https://thelostherbs.com/wp-content/uploads/2021/0...s-and-Lemon-Step-2-300x218.jpg 300w" width="500" />
 /thelostherbs.com/wp-content/uploads/2021/09/How-to-Treat-Cough-With-Beets-and-Lemon-Step-3-300x225.jpg" target="_blank">https://thelostherbs.com/wp-content/uploads/2021/0...s-and-Lemon-Step-3-300x225.jpg 300w" width="500" />
 /thelostherbs.com/wp-content/uploads/2021/09/How-to-Treat-Cough-With-Beets-and-Lemon-Step-4-300x218.jpg" target="_blank">https://thelostherbs.com/wp-content/uploads/2021/0...s-and-Lemon-Step-4-300x218.jpg 300w" width="500" />
 /thelostherbs.com/wp-content/uploads/2021/09/How-to-Treat-Cough-With-Beets-and-Ginger-Ingredients-300x225.jpg" target="_blank">https://thelostherbs.com/wp-content/uploads/2021/0...Ginger-Ingredients-300x225.jpg 300w" width="350" />
 /thelostherbs.com/wp-content/uploads/2021/09/How-to-Treat-Cough-With-Beets-and-Ginger-Step-1-300x225.jpg" target="_blank">https://thelostherbs.com/wp-content/uploads/2021/0...-and-Ginger-Step-1-300x225.jpg 300w" width="500" />
 /thelostherbs.com/wp-content/uploads/2021/09/How-to-Treat-Cough-With-Beets-and-Ginger-Step-2-300x225.jpg" target="_blank">https://thelostherbs.com/wp-content/uploads/2021/0...-and-Ginger-Step-2-300x225.jpg 300w" width="500" />
 /thelostherbs.com/wp-content/uploads/2021/09/How-to-Treat-Cough-With-Beets-and-Ginger-Step-3-300x225.jpg" target="_blank">https://thelostherbs.com/wp-content/uploads/2021/0...-and-Ginger-Step-3-300x225.jpg 300w" width="500" />
 /thelostherbs.com/wp-content/uploads/2021/04/16-Medicinal-Herbs-You-Should-Grow-Side-by-Side-Basil-and-Marjoram-300x251.jpg" target="_blank">https://thelostherbs.com/wp-content/uploads/2021/0...Basil-and-Marjoram-300x251.jpg 300w" width="350" />
 /thelostherbs.com/wp-content/uploads/2021/04/16-Medicinal-Herbs-You-Should-Grow-Side-by-Side-Dill-300x225.jpg" target="_blank">https://thelostherbs.com/wp-content/uploads/2021/0...-Side-by-Side-Dill-300x225.jpg 300w" width="350" />This fun-looking herb is usually regarded as popular for pickles. After all, dill pickles wouldn’t exist without it.
 /thelostherbs.com/wp-content/uploads/2021/04/16-Medicinal-Herbs-You-Should-Grow-Side-by-Side-Oregano-e1617870424936-300x195.jpg" target="_blank">https://thelostherbs.com/wp-content/uploads/2021/0...ano-e1617870424936-300x195.jpg 300w" width="350" />
 /thelostherbs.com/wp-content/uploads/2021/04/16-Medicinal-Herbs-You-Should-Grow-Side-by-Side-Thyme-e1617871148663-300x212.jpg" target="_blank">https://thelostherbs.com/wp-content/uploads/2021/0...yme-e1617871148663-300x212.jpg 300w" width="350" />There are several different types of thyme and all of them are full of vitamins A and C. This makes it the perfect herb for treating colds or any virus.
  /thelostherbs.com/wp-content/uploads/2021/04/16-Medicinal-Herbs-You-Should-Grow-Side-by-Side-Lavender-300x200.jpg" target="_blank">https://thelostherbs.com/wp-content/uploads/2021/0...e-by-Side-Lavender-300x200.jpg 300w" width="350" />You likely know lavender as a calming and soothing plant, used to help people combat stress and anxiety. It’s good for inducing sleep and helping you sleep better, too.
 /thelostherbs.com/wp-content/uploads/2020/10/Banner-SSB-Plants-Ilus-1-300x297.jpg" target="_blank">https://thelostherbs.com/wp-content/uploads/2020/1...-SSB-Plants-Ilus-1-300x297.jpg
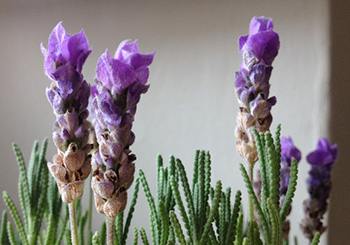 /thelostherbs.com/wp-content/uploads/2021/09/How-To-Make-A-Whipped-Lavender-Cream-300x210.jpg" target="_blank">https://thelostherbs.com/wp-content/uploads/2021/0...ped-Lavender-Cream-300x210.jpg 300w" width="350" />Linalyl acetate and linalool are the major components of lavender that regulate serotonin and its related receptors. They both have their maximum absorption approximately 20 minutes after topical application, after which time they are easily detected in the bloodstream, brain, and lungs. These components do not accumulate in the body, so will be flushed and excreted through the body within about 90 minutes. This has both pros and cons; on one hand, lavender is safe when used frequently over a long period at low doses, but on the other hand, its medicinal effects fade after 90 minutes. In short, this means many lavender-based topical therapies can be and should be, applied at regular intervals on an as-needed basis.
 /thelostherbs.com/wp-content/uploads/2021/09/How-To-Make-A-Whipped-Lavender-Cream-Lavender-Extraction-300x273.jpg" target="_blank">https://thelostherbs.com/wp-content/uploads/2021/0...avender-Extraction-300x273.jpg 300w" width="350" />
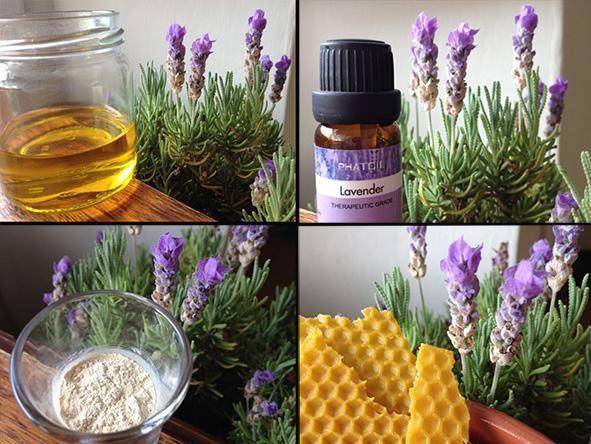 /thelostherbs.com/wp-content/uploads/2021/09/How-To-Make-A-Whipped-Lavender-Cream-Method-e1633017572585-300x225.jpg" target="_blank">https://thelostherbs.com/wp-content/uploads/2021/0...hod-e1633017572585-300x225.jpg 300w" width="591" />
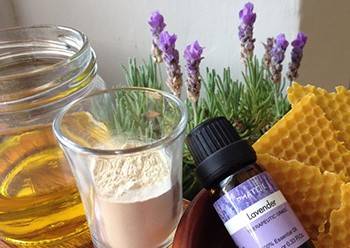 /thelostherbs.com/wp-content/uploads/2021/09/How-To-Make-A-Whipped-Lavender-Cream-Ingredients-e1633018573603-300x213.jpg" target="_blank">https://thelostherbs.com/wp-content/uploads/2021/0...nts-e1633018573603-300x213.jpg 300w" width="350" />
 /thelostherbs.com/wp-content/uploads/2021/09/How-To-Make-A-Whipped-Lavender-Cream-Step-1-300x240.jpg" target="_blank">https://thelostherbs.com/wp-content/uploads/2021/0...ender-Cream-Step-1-300x240.jpg 300w" width="500" />
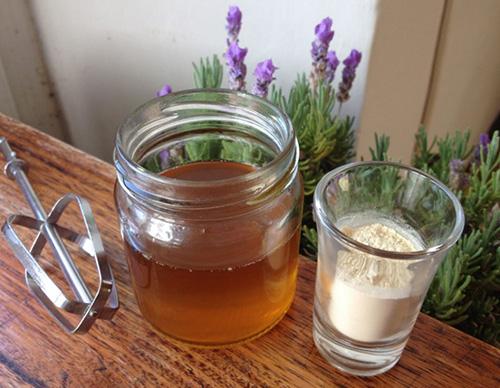 /thelostherbs.com/wp-content/uploads/2021/09/How-To-Make-A-Whipped-Lavender-Cream-Step-2-300x233.jpg" target="_blank">https://thelostherbs.com/wp-content/uploads/2021/0...ender-Cream-Step-2-300x233.jpg 300w" width="500" />
 /thelostherbs.com/wp-content/uploads/2021/09/How-To-Make-A-Whipped-Lavender-Cream-Step-3-300x239.jpg" target="_blank">https://thelostherbs.com/wp-content/uploads/2021/0...ender-Cream-Step-3-300x239.jpg 300w" width="500" />
 /thelostherbs.com/wp-content/uploads/2021/09/How-To-Make-A-Whipped-Lavender-Cream-Step-4-300x250.jpg" target="_blank">https://thelostherbs.com/wp-content/uploads/2021/0...ender-Cream-Step-4-300x250.jpg 300w" width="500" />
 /thelostherbs.com/wp-content/uploads/2021/05/Banner-WFG-anxiety-300x300.jpg" target="_blank">https://thelostherbs.com/wp-content/uploads/2021/05/Banner-WFG-anxiety-300x300.jpg

 /thelostherbs.com/wp-content/uploads/2021/09/Kill-Hunger-With-This-Herb-Origins-296x300.jpg" target="_blank">https://thelostherbs.com/wp-content/uploads/2021/0...-This-Herb-Origins-296x300.jpg 296w" width="350" />
 /thelostherbs.com/wp-content/uploads/2021/09/Kill-Hunger-With-This-Herb-Benefits-300x225.jpg" target="_blank">https://thelostherbs.com/wp-content/uploads/2021/0...This-Herb-Benefits-300x225.jpg 300w" width="350" />
 /thelostherbs.com/wp-content/uploads/2021/09/Kill-Hunger-With-This-Herb-Fenugreek-300x200.jpg" target="_blank">https://thelostherbs.com/wp-content/uploads/2021/0...his-Herb-Fenugreek-300x200.jpg 300w" width="350" />Of course, there are potential weight-loss advantages; if you are staying satiated longer and there is no urge to eat or feel hungry for long periods, of course, there may be some positive weight outcomes.
 /thelostherbs.com/wp-content/uploads/2021/09/Kill-Hunger-With-This-Herb-How-to-Take-Fenugreek-300x201.jpg" target="_blank">https://thelostherbs.com/wp-content/uploads/2021/0...-to-Take-Fenugreek-300x201.jpg 300w" width="350" />
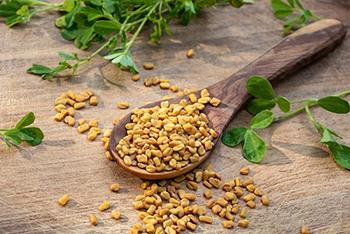 /thelostherbs.com/wp-content/uploads/2021/09/Kill-Hunger-With-This-Herb-Fenugreek-Safe-300x201.jpg" target="_blank">https://thelostherbs.com/wp-content/uploads/2021/0...erb-Fenugreek-Safe-300x201.jpg 300w" width="350" />
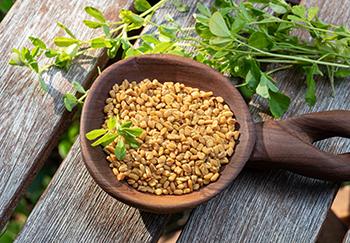 /thelostherbs.com/wp-content/uploads/2021/09/Kill-Hunger-With-This-Herb-Fenugreek-Safe-to-Consume-300x208.jpg" target="_blank">https://thelostherbs.com/wp-content/uploads/2021/0...ek-Safe-to-Consume-300x208.jpg 300w" width="350" />
 /thelostherbs.com/wp-content/uploads/2021/09/Kill-Hunger-With-This-Herb-Tea-1-300x205.jpg" target="_blank">https://thelostherbs.com/wp-content/uploads/2021/0...th-This-Herb-Tea-1-300x205.jpg 300w" width="500" />
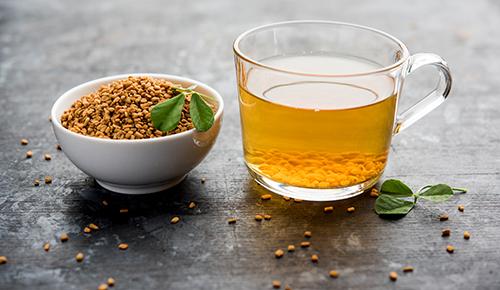 /thelostherbs.com/wp-content/uploads/2021/09/Kill-Hunger-With-This-Herb-Tea-2-300x174.jpg" target="_blank">https://thelostherbs.com/wp-content/uploads/2021/0...th-This-Herb-Tea-2-300x174.jpg 300w" width="500" />
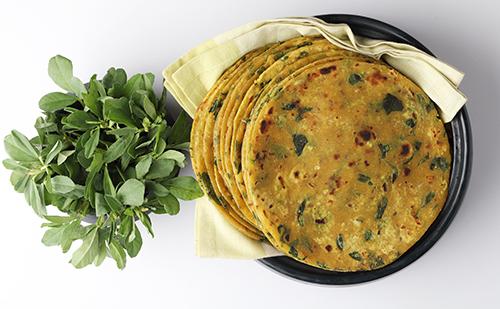 /thelostherbs.com/wp-content/uploads/2021/09/Kill-Hunger-With-This-Herb-Fenugreek-Food-300x185.jpg" target="_blank">https://thelostherbs.com/wp-content/uploads/2021/0...erb-Fenugreek-Food-300x185.jpg 300w" width="500" />
 /thelostherbs.com/wp-content/uploads/2021/09/Kill-Hunger-With-This-Herb-Fenugreek-Tincture-205x300.jpg" target="_blank">https://thelostherbs.com/wp-content/uploads/2021/0...Fenugreek-Tincture-205x300.jpg 205w" width="350" />
 /thelostherbs.com/wp-content/uploads/2021/09/5-Plants-Similar-to-Insulin-that-Lower-Your-Blood-Sugar-300x233.jpg" target="_blank">https://thelostherbs.com/wp-content/uploads/2021/0...r-Your-Blood-Sugar-300x233.jpg 300w" width="350" />
 /thelostherbs.com/wp-content/uploads/2021/09/5-Plants-Similar-to-Insulin-that-Lower-Your-Blood-Sugar-Aloe-Vera-Juice-300x228.jpg" target="_blank">https://thelostherbs.com/wp-content/uploads/2021/0...ar-Aloe-Vera-Juice-300x228.jpg 300w" width="350" />
 /thelostherbs.com/wp-content/uploads/2021/09/5-Plants-Similar-to-Insulin-that-Lower-Your-Blood-Sugar-Aloe-Vera-Supplements-288x300.jpg" target="_blank">https://thelostherbs.com/wp-content/uploads/2021/0...e-Vera-Supplements-288x300.jpg 288w" width="350" />
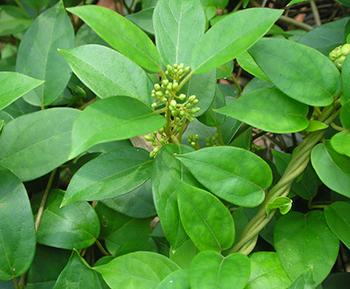 /thelostherbs.com/wp-content/uploads/2021/09/5-Plants-Similar-to-Insulin-that-Lower-Your-Blood-Sugar-Gymnema-300x248.jpg" target="_blank">https://thelostherbs.com/wp-content/uploads/2021/0...lood-Sugar-Gymnema-300x248.jpg 300w" width="350" />Gymnema is a natural herb used primarily as a treatment for DiabetesDiabetes in India as part of the Ayurvedic tradition. The Hindu name for the plant “Gurmar” directly translates to “sugar destroyer”.
 /thelostherbs.com/wp-content/uploads/2021/09/5-Plants-Similar-to-Insulin-that-Lower-Your-Blood-Sugar-Cinnamon-300x239.jpg" target="_blank">https://thelostherbs.com/wp-content/uploads/2021/0...ood-Sugar-Cinnamon-300x239.jpg 300w" width="350" />The cinnamon formats that are used in cinnamon supplements can be made from either the whole cinnamon that is then powdered or a cinnamon extract.
 /thelostherbs.com/wp-content/uploads/2021/09/5-Plants-Similar-to-Insulin-that-Lower-Your-Blood-Sugar-American-Ginseng-300x219.jpg" target="_blank">https://thelostherbs.com/wp-content/uploads/2021/0...r-American-Ginseng-300x219.jpg 300w" width="350" />
 /thelostherbs.com/wp-content/uploads/2021/09/5-Plants-Similar-to-Insulin-that-Lower-Your-Blood-Sugar-Fenugreek-300x225.jpg" target="_blank">https://thelostherbs.com/wp-content/uploads/2021/0...od-Sugar-Fenugreek-300x225.jpg 300w" width="350" />
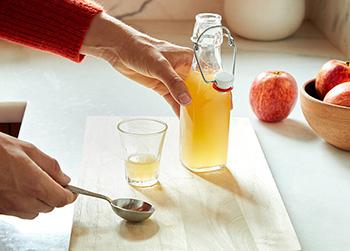 /thelostherbs.com/wp-content/uploads/2021/04/10-Remedies-you-can-find-in-your-kitchen-Apple-Cider-Vinegar-300x215.jpg" target="_blank">https://thelostherbs.com/wp-content/uploads/2021/0...pple-Cider-Vinegar-300x215.jpg 300w" width="350" />
 /thelostherbs.com/wp-content/uploads/2021/04/10-Remedies-you-can-find-in-your-kitchen-Garlic-300x297.jpg" target="_blank">https://thelostherbs.com/wp-content/uploads/2021/0...our-kitchen-Garlic-300x297.jpg 300w" width="350" />
 /thelostherbs.com/wp-content/uploads/2021/04/10-Remedies-you-can-find-in-your-kitchen-Honey-300x199.jpg" target="_blank">https://thelostherbs.com/wp-content/uploads/2021/0...your-kitchen-Honey-300x199.jpg 300w" width="350" />
 /thelostherbs.com/wp-content/uploads/2021/04/10-Remedies-you-can-find-in-your-kitchen-Ginger-300x175.jpg" target="_blank">https://thelostherbs.com/wp-content/uploads/2021/0...our-kitchen-Ginger-300x175.jpg 300w" width="350" />
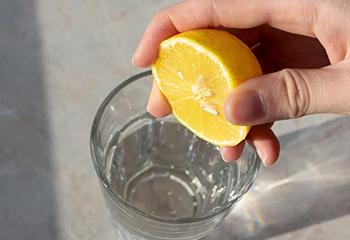 /thelostherbs.com/wp-content/uploads/2021/04/10-Remedies-you-can-find-in-your-kitchen-Lemon-300x206.jpg" target="_blank">https://thelostherbs.com/wp-content/uploads/2021/0...your-kitchen-Lemon-300x206.jpg 300w" width="350" />
 /thelostherbs.com/wp-content/uploads/2021/04/10-Remedies-you-can-find-in-your-kitchen-Chilli-300x225.jpg" target="_blank">https://thelostherbs.com/wp-content/uploads/2021/0...our-kitchen-Chilli-300x225.jpg 300w" width="350" />Strain the infused oil through a cheesecloth to remove the chilis.
 /thelostherbs.com/wp-content/uploads/2021/04/10-Remedies-you-can-find-in-your-kitchen-Rosemary-300x191.jpg" target="_blank">https://thelostherbs.com/wp-content/uploads/2021/0...r-kitchen-Rosemary-300x191.jpg 300w" width="350" />